
Golf Cake Balls

I don't know about you, but most of the dads in my life are big golfers, or at least golf fans. I wonder if that's a requirement for fatherhood: must like golf.
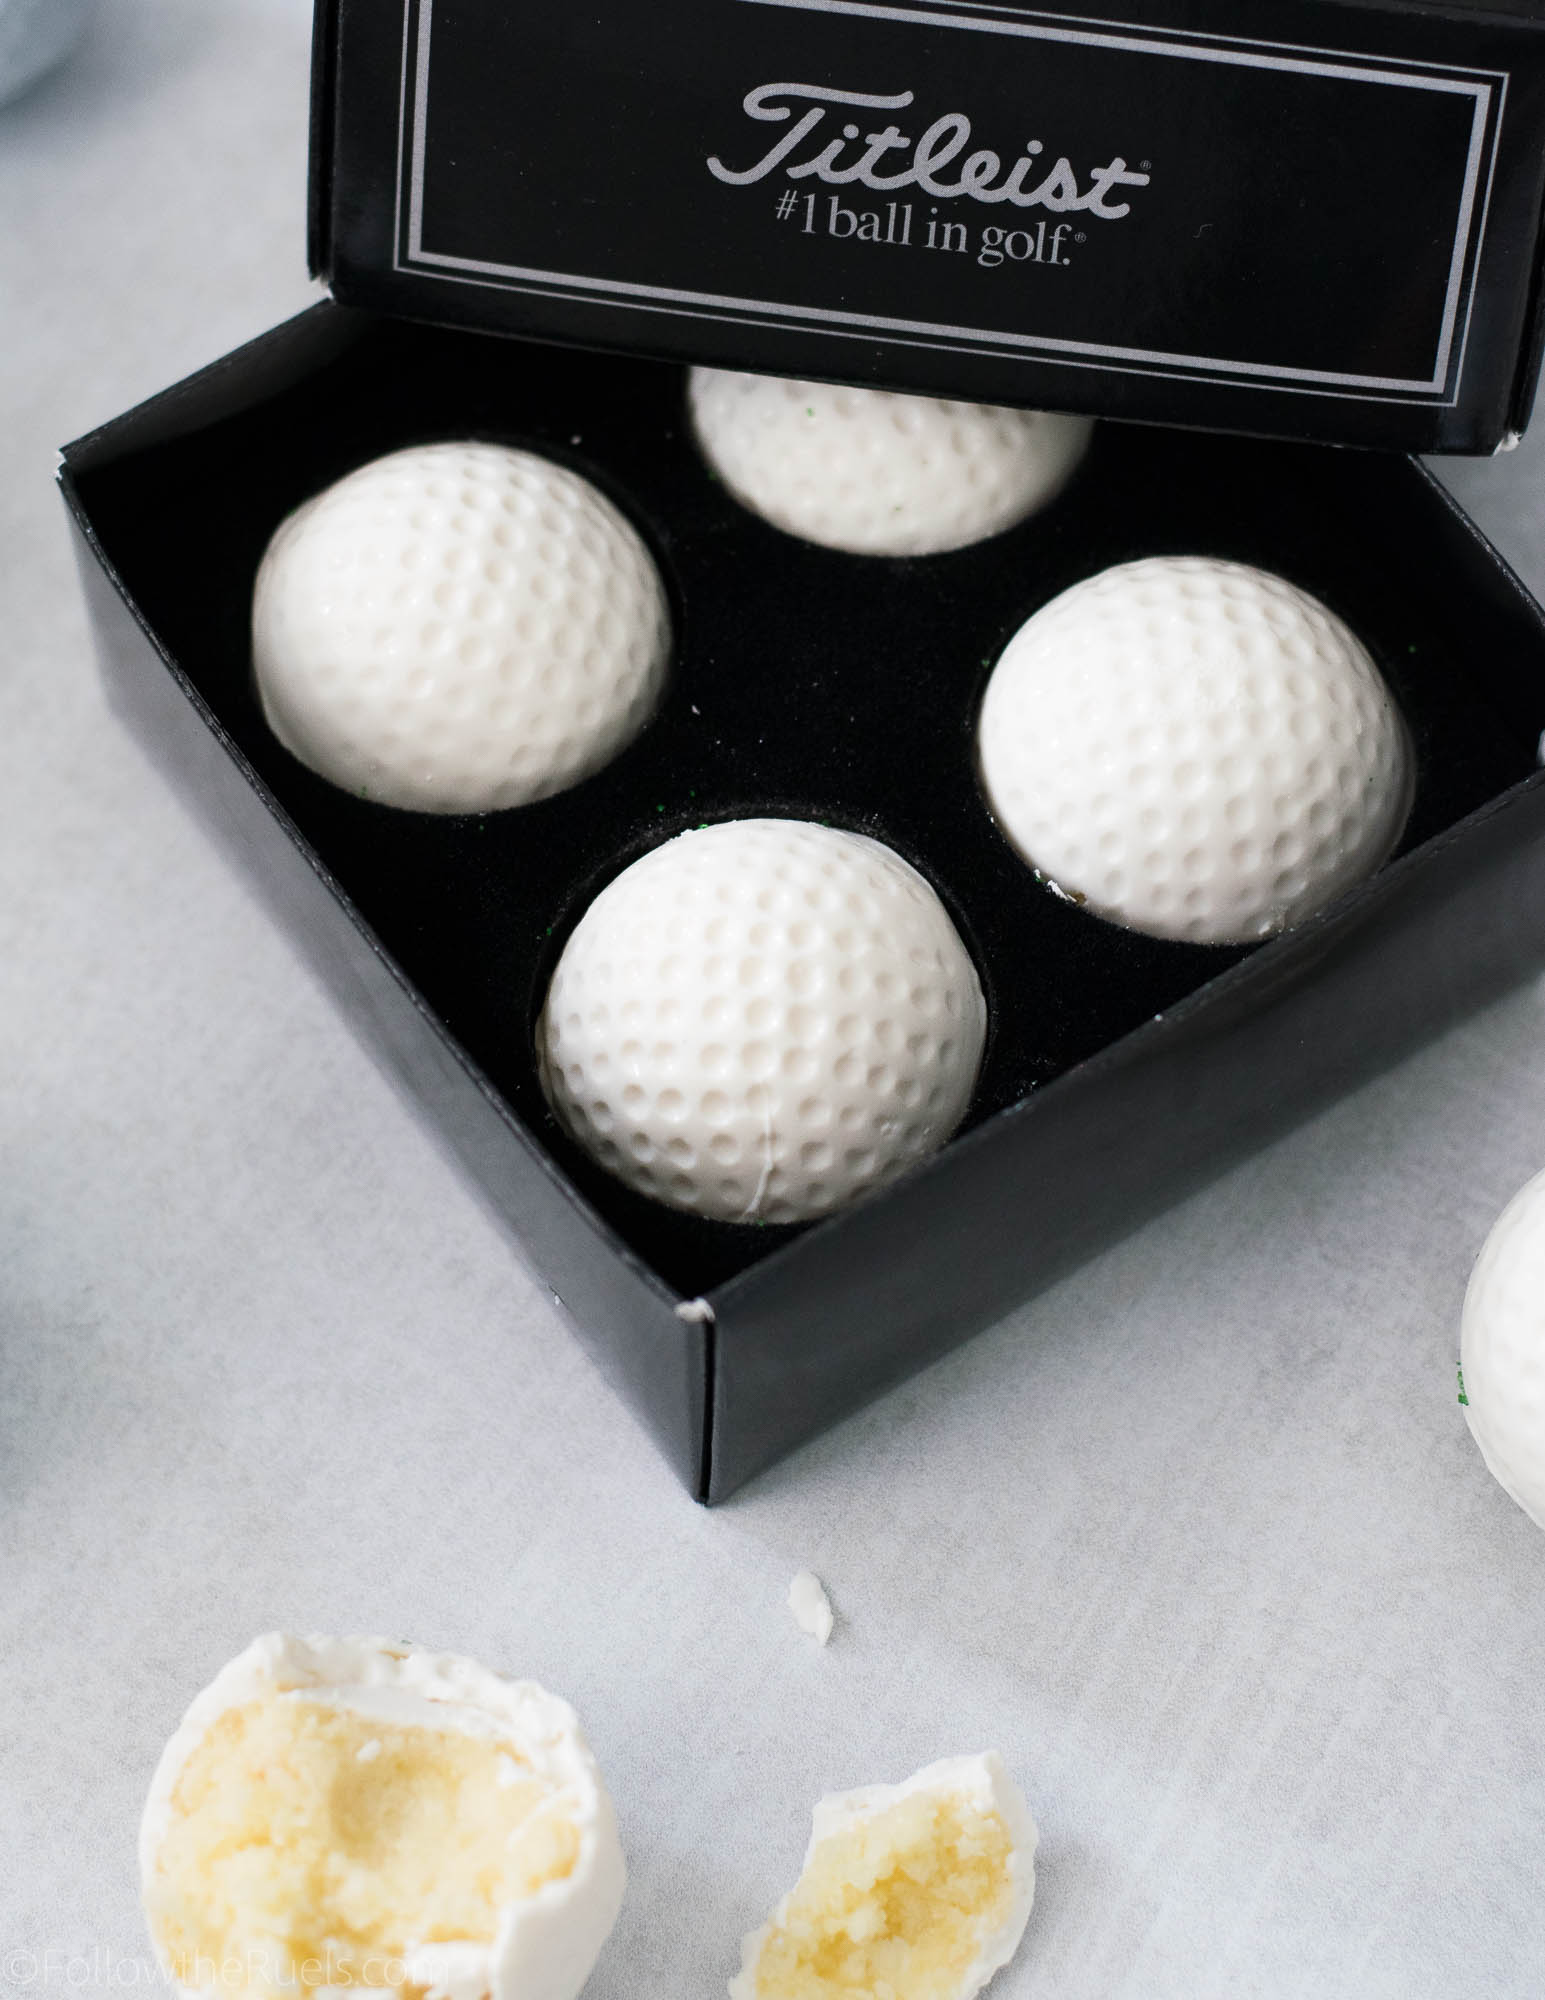
As a fun Father's Day treat this year, I thought I would tap into their love of golf and love of sweets to make these super cute golf cake balls. I have actually had the molds for these golf balls for over a year (maybe 2) and finally found the chance to use them!
If you haven't made cake balls before, you should know that they are incredibly easy to make. And I think the molds make it even easier! No dipping the balls into melted chocolate only to have the ball fall in, or not cover the ball enough. Nope! Just set the cake ball in the mold, let it harden, and you are set! I'll share all my tips for making these cute golf cake balls below.
How to Make Them
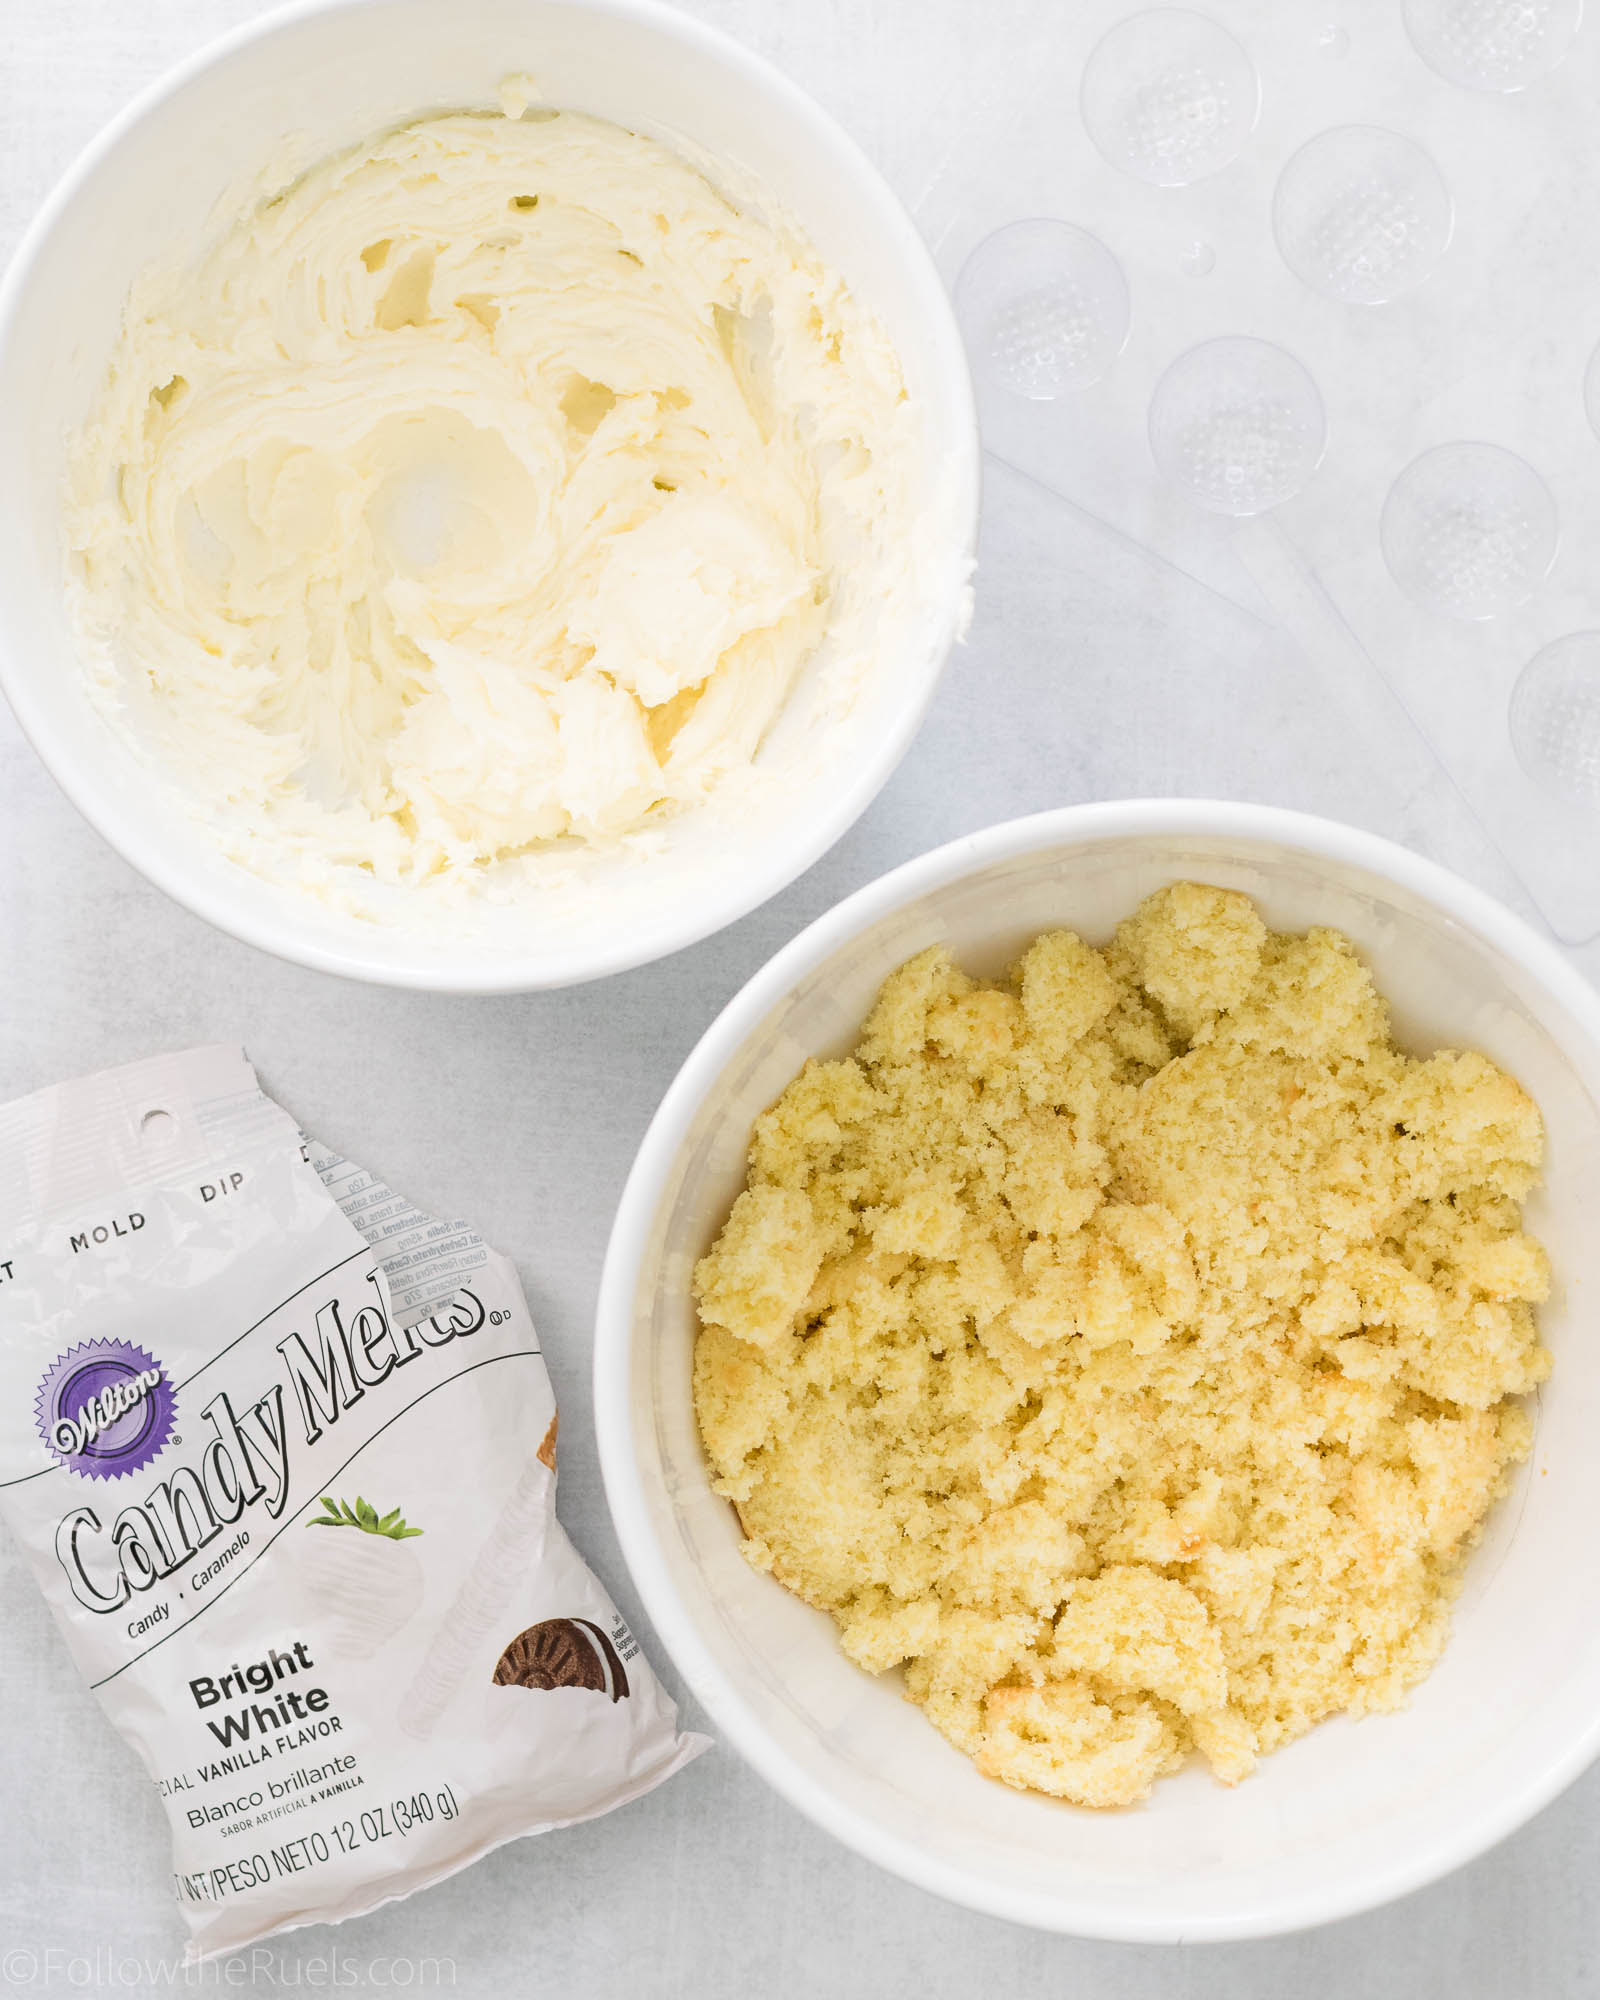
Cake balls don't require a whole lot of supplies or ingredients. All you need is some cake (it can be homemade, from a box mix, or store bought), some icing (again, homemade or storebought), and some candy melts. I highly recommend candy melts over plain white chocolate because it has a higher melting point. That will come in really handy if you have to handle the cake balls after they set.

First, crumble up the cake into pretty fine crumbs. Then mix in the frosting until it's about the consistency of a dry cookie dough. You want the cake balls to stick together, but you don't want them to be too soggy with frosting.
Use a spoon or scoop to create almost golf ball sized balls of the cake ball mixture. You want the balls to be slightly smaller than the golf ball mold.
Roll the balls between the palms of your hands so they are nice and smooth.
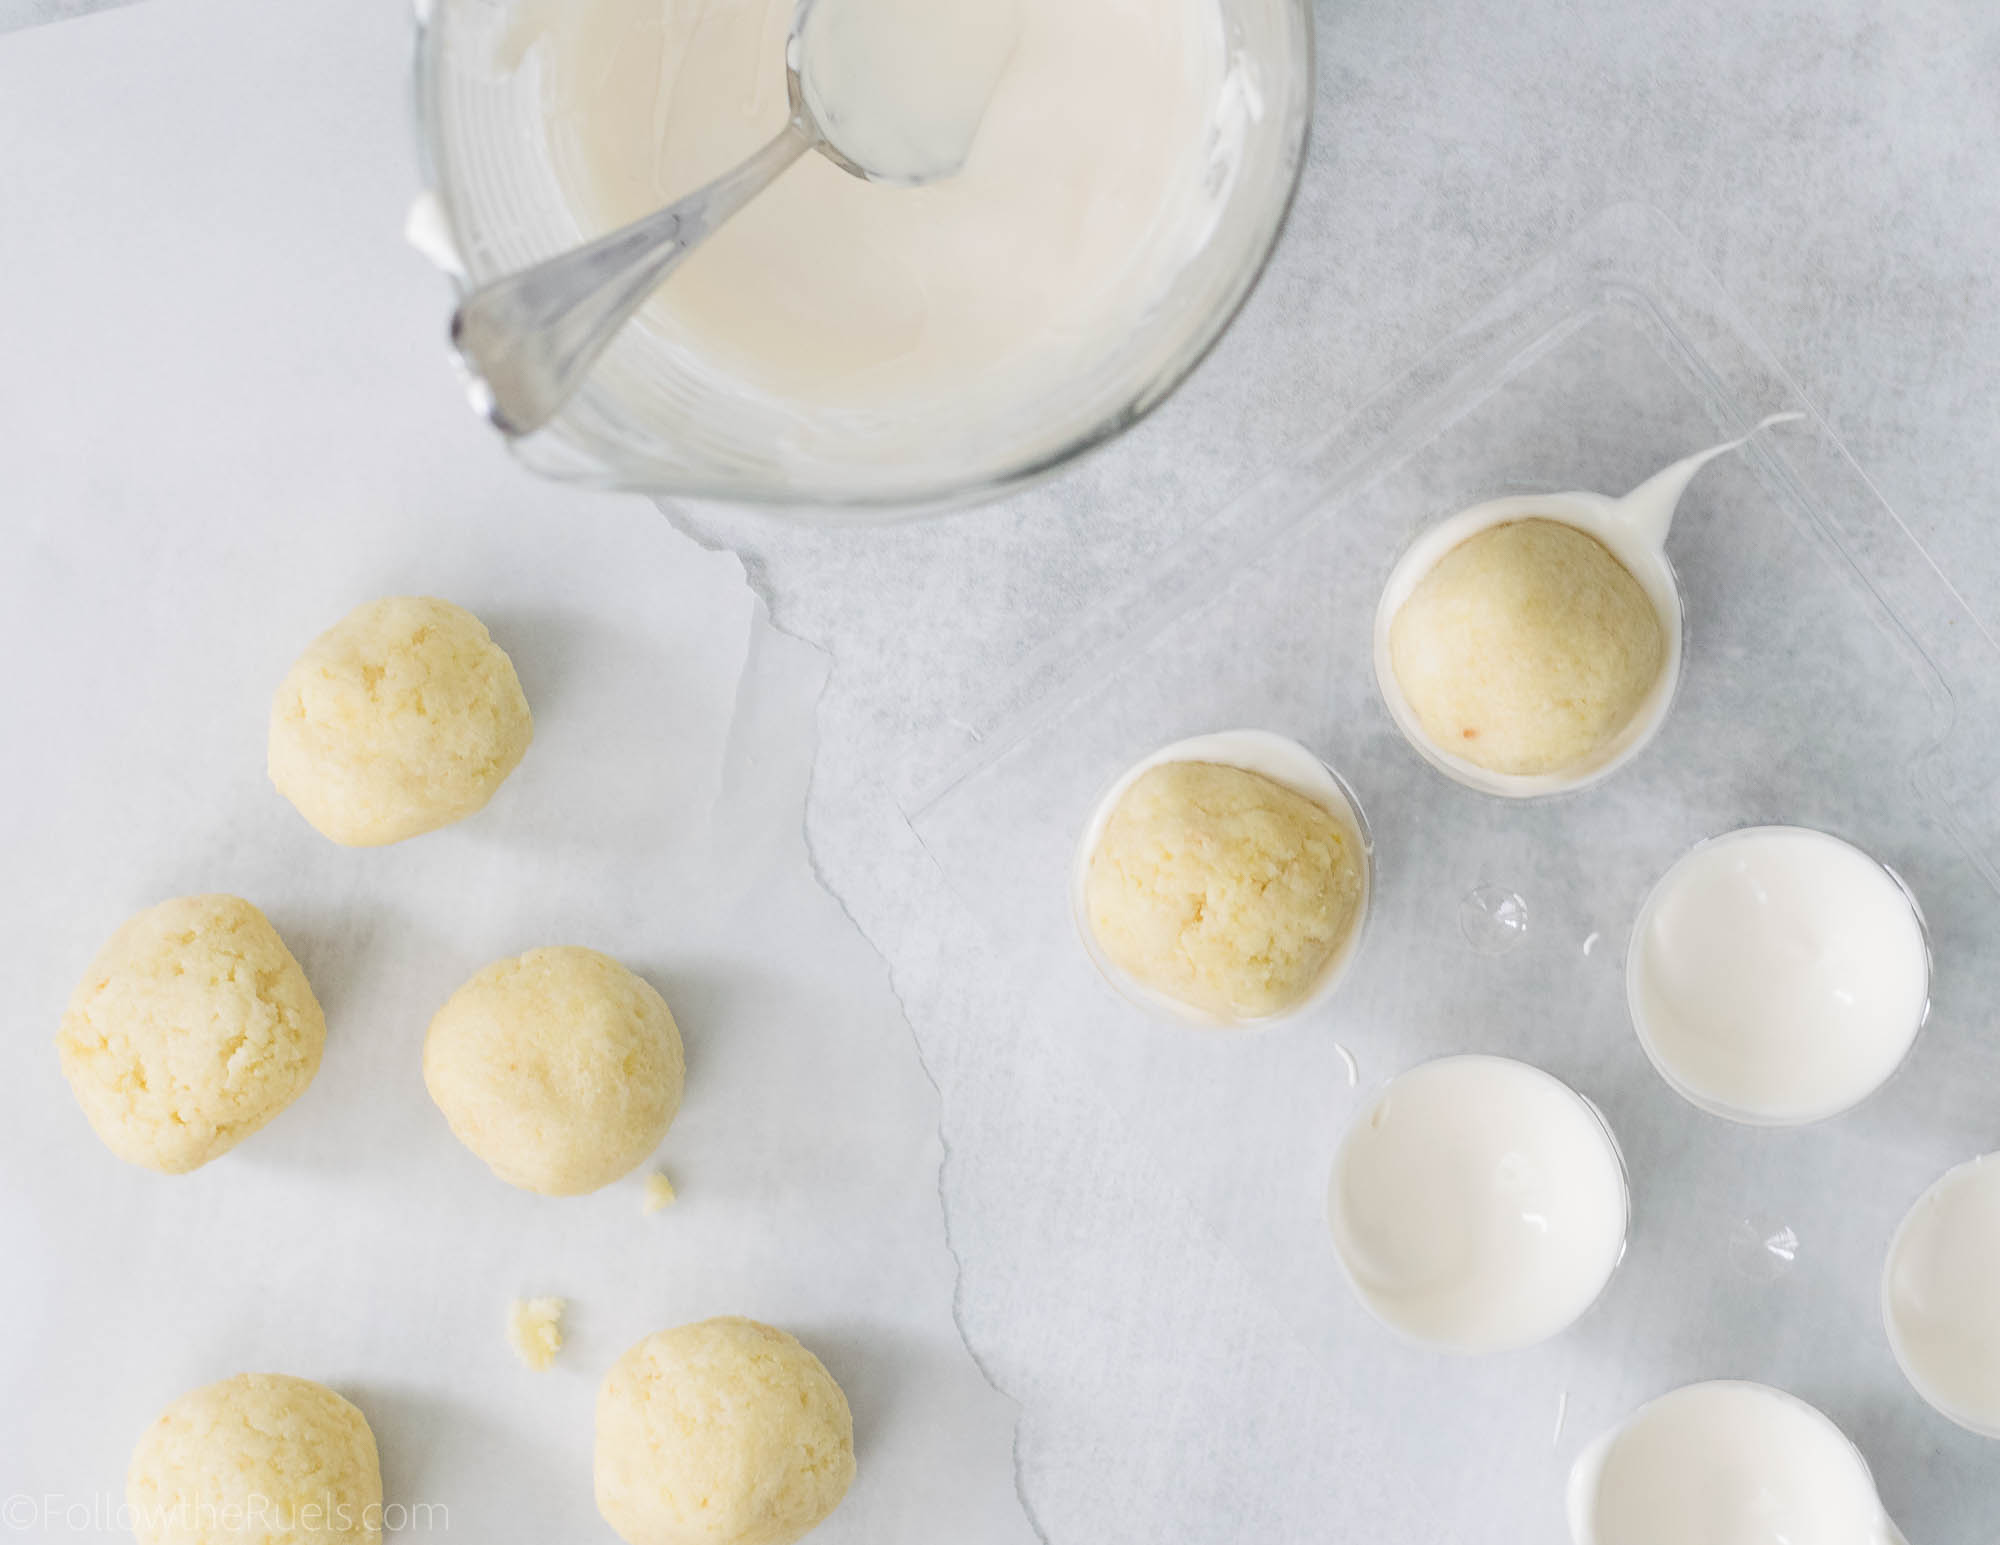
Spoon the melted candy melt mixture into half of the cake ball mold. Swirl the candy around the cavity making sure that it is covering every part of the hole created by the golf ball mold. I would even recommend having some of the candy come up over the edge, but you don't want too much that it spills out too much when the cake ball is placed in it.
Then, place the cake ball into the molds.
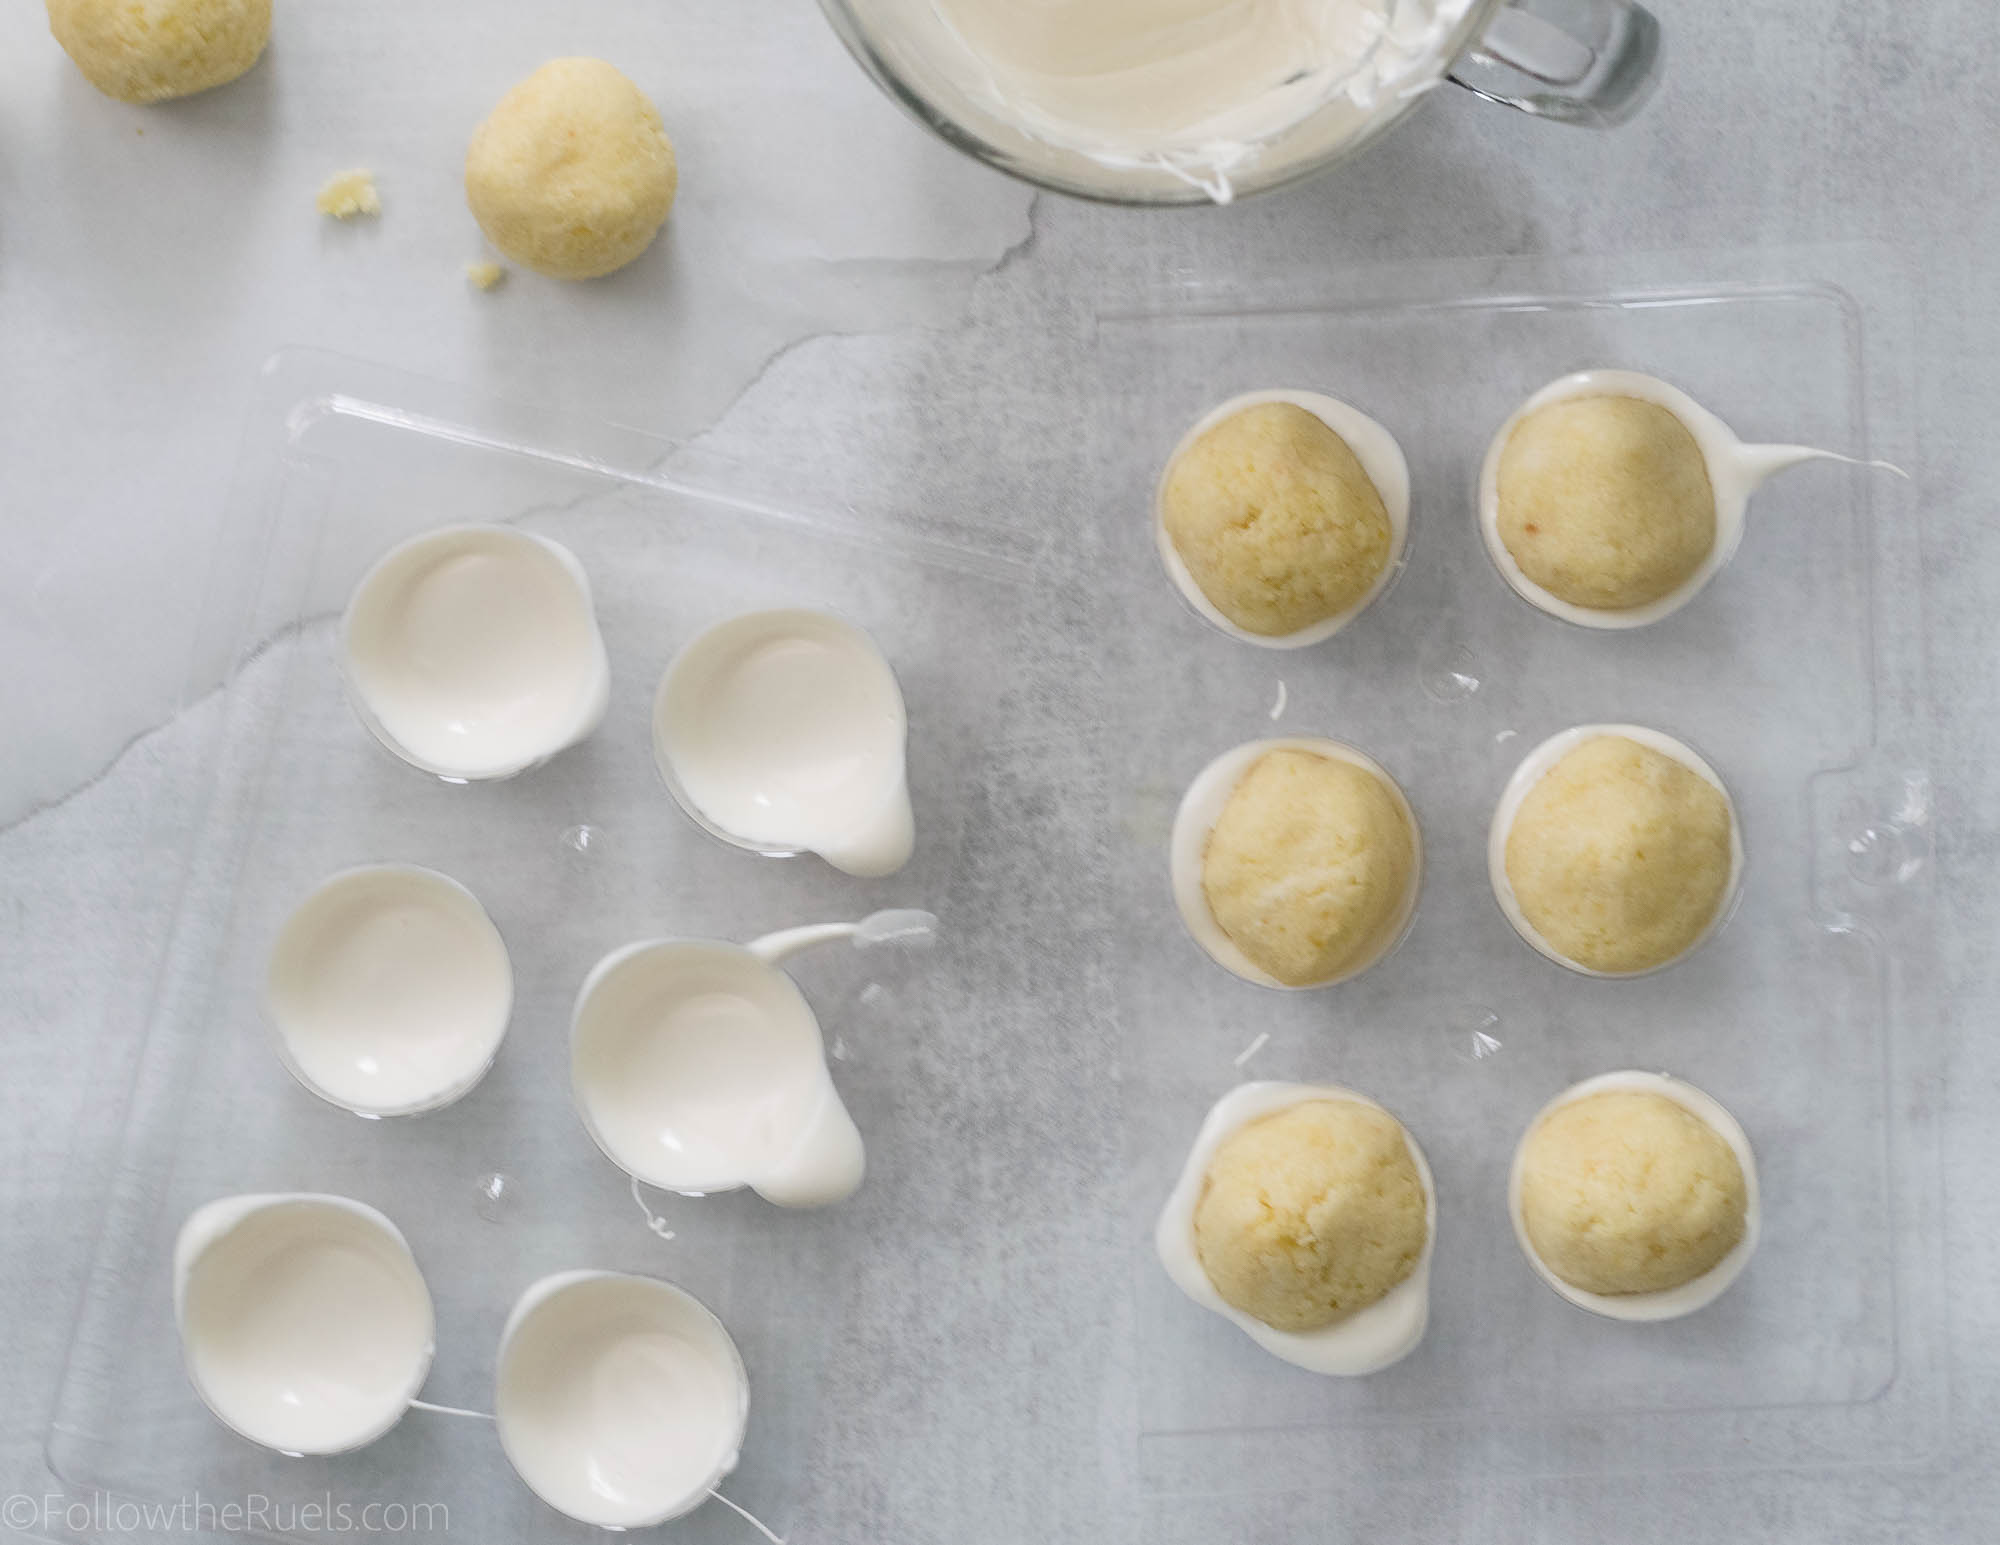
Repeat the candy melt process with the other half of the mold, making sure to cover every little nook and cranny of the cavity.
Invert the mold without the cake balls onto the mold with the cake balls and align them so that the edges line up. Give the mold a good squeeze and tap to ensure that the candy comes together at the seam.
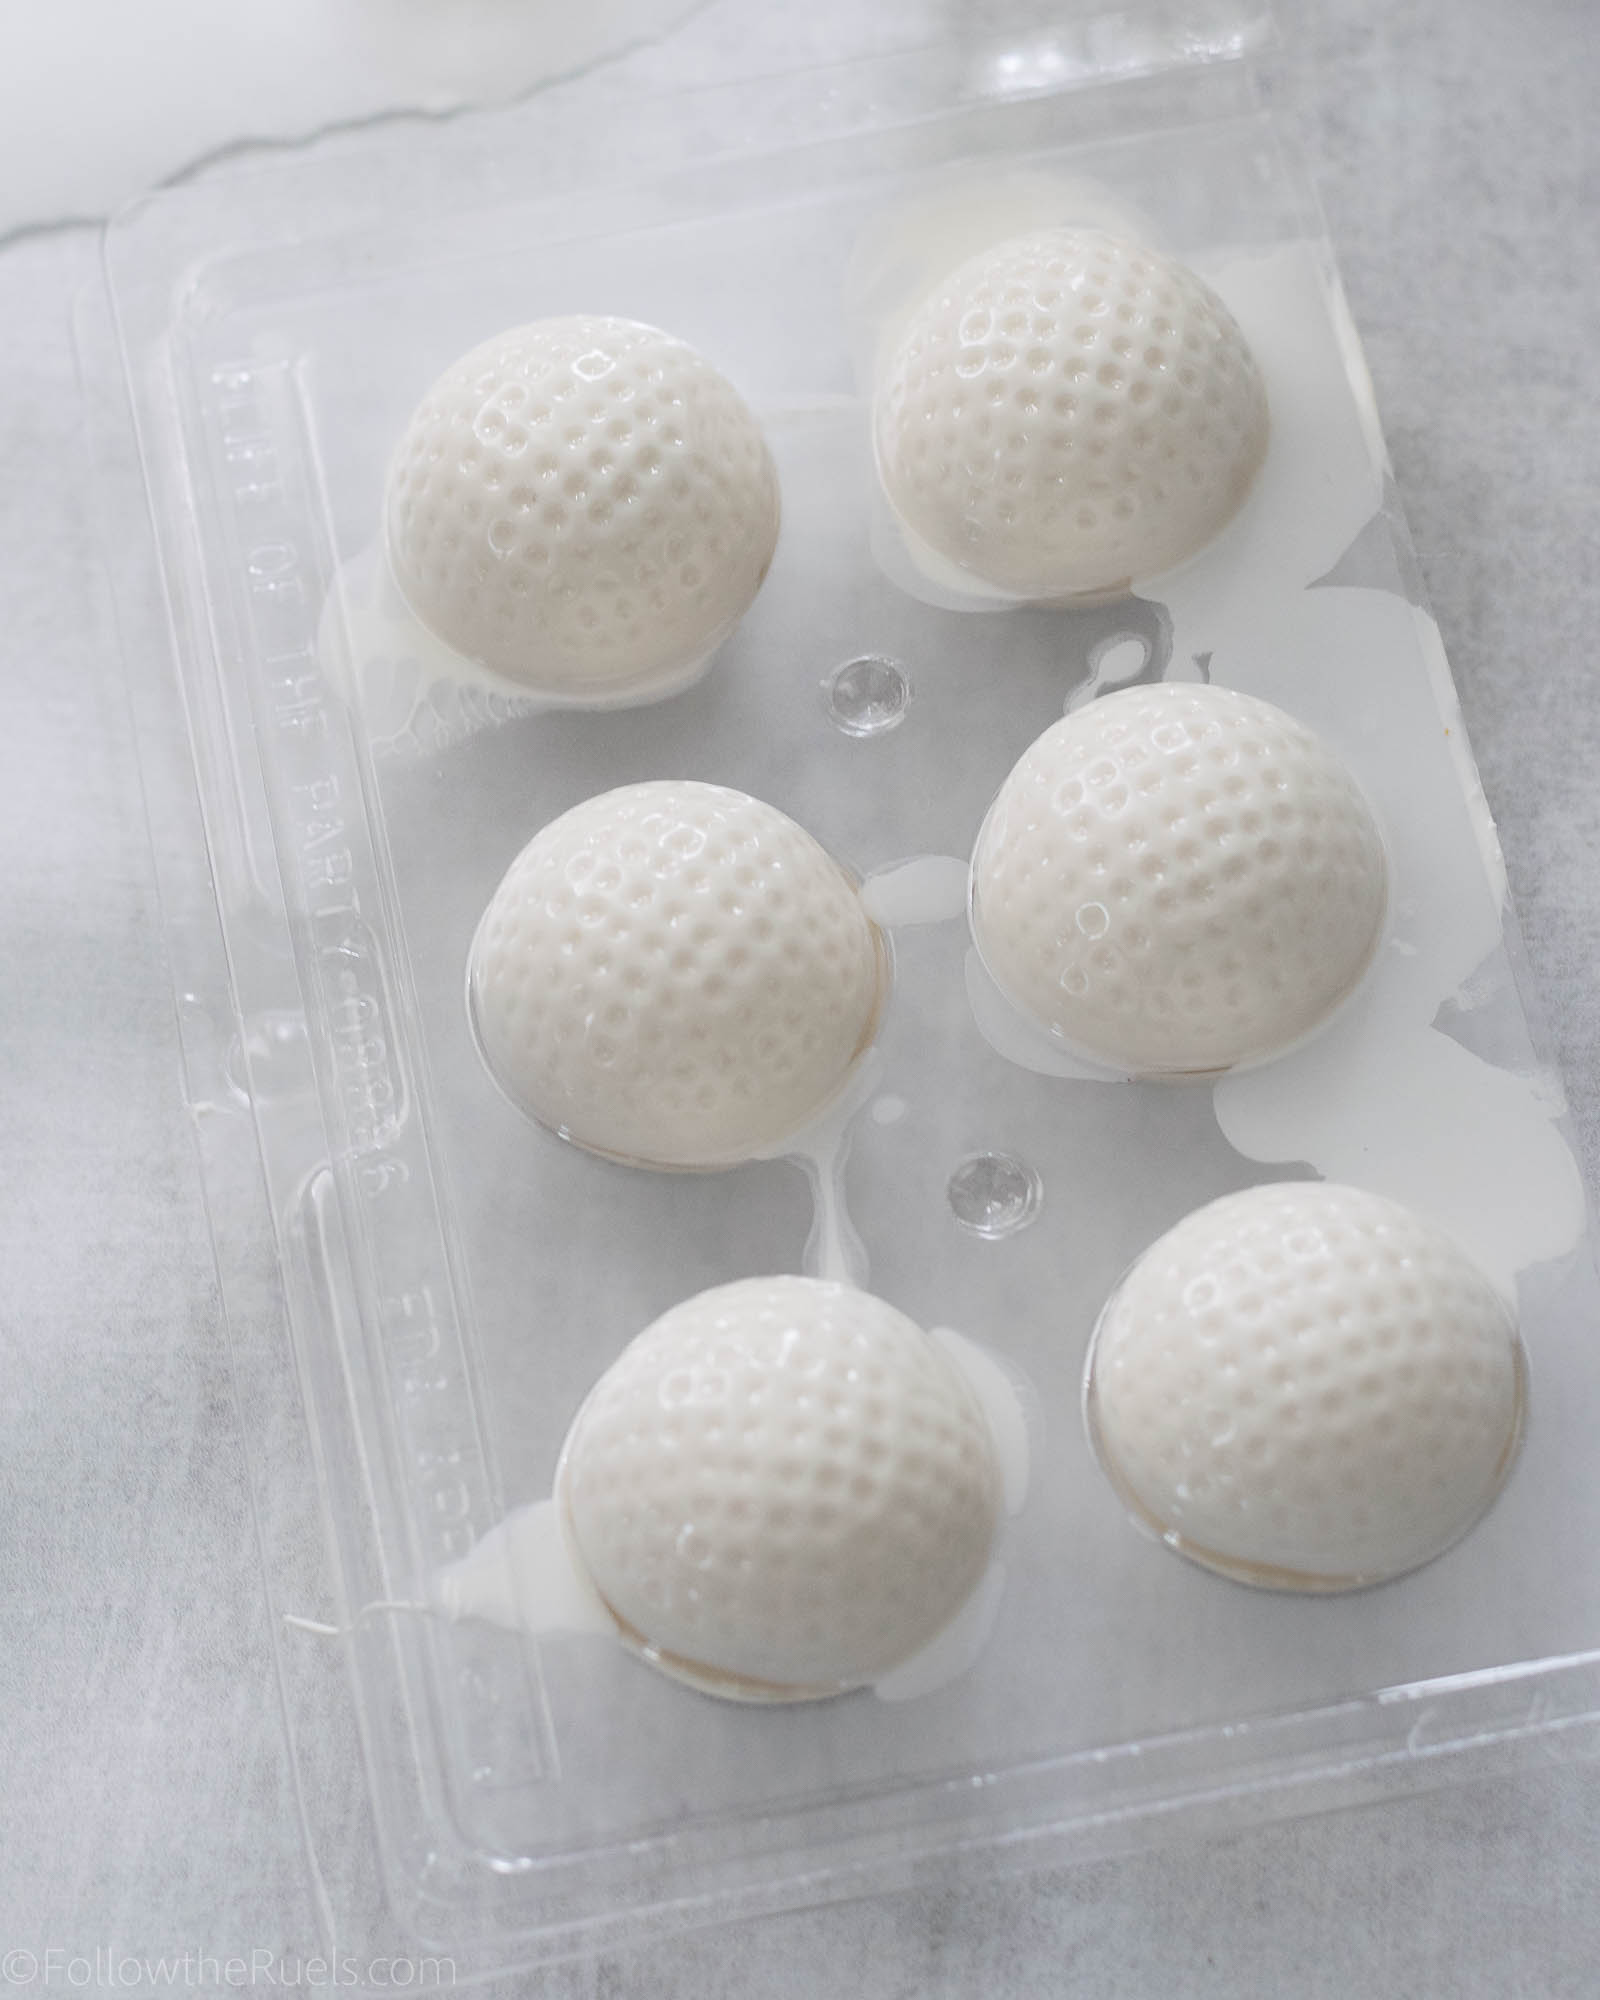
Place the mold in the fridge or freezer to set for about 15-20 minutes.
Once out of the fridge or freezer, you can scrape off any exposed seams with a small knife.
After that, they are ready to eat!!
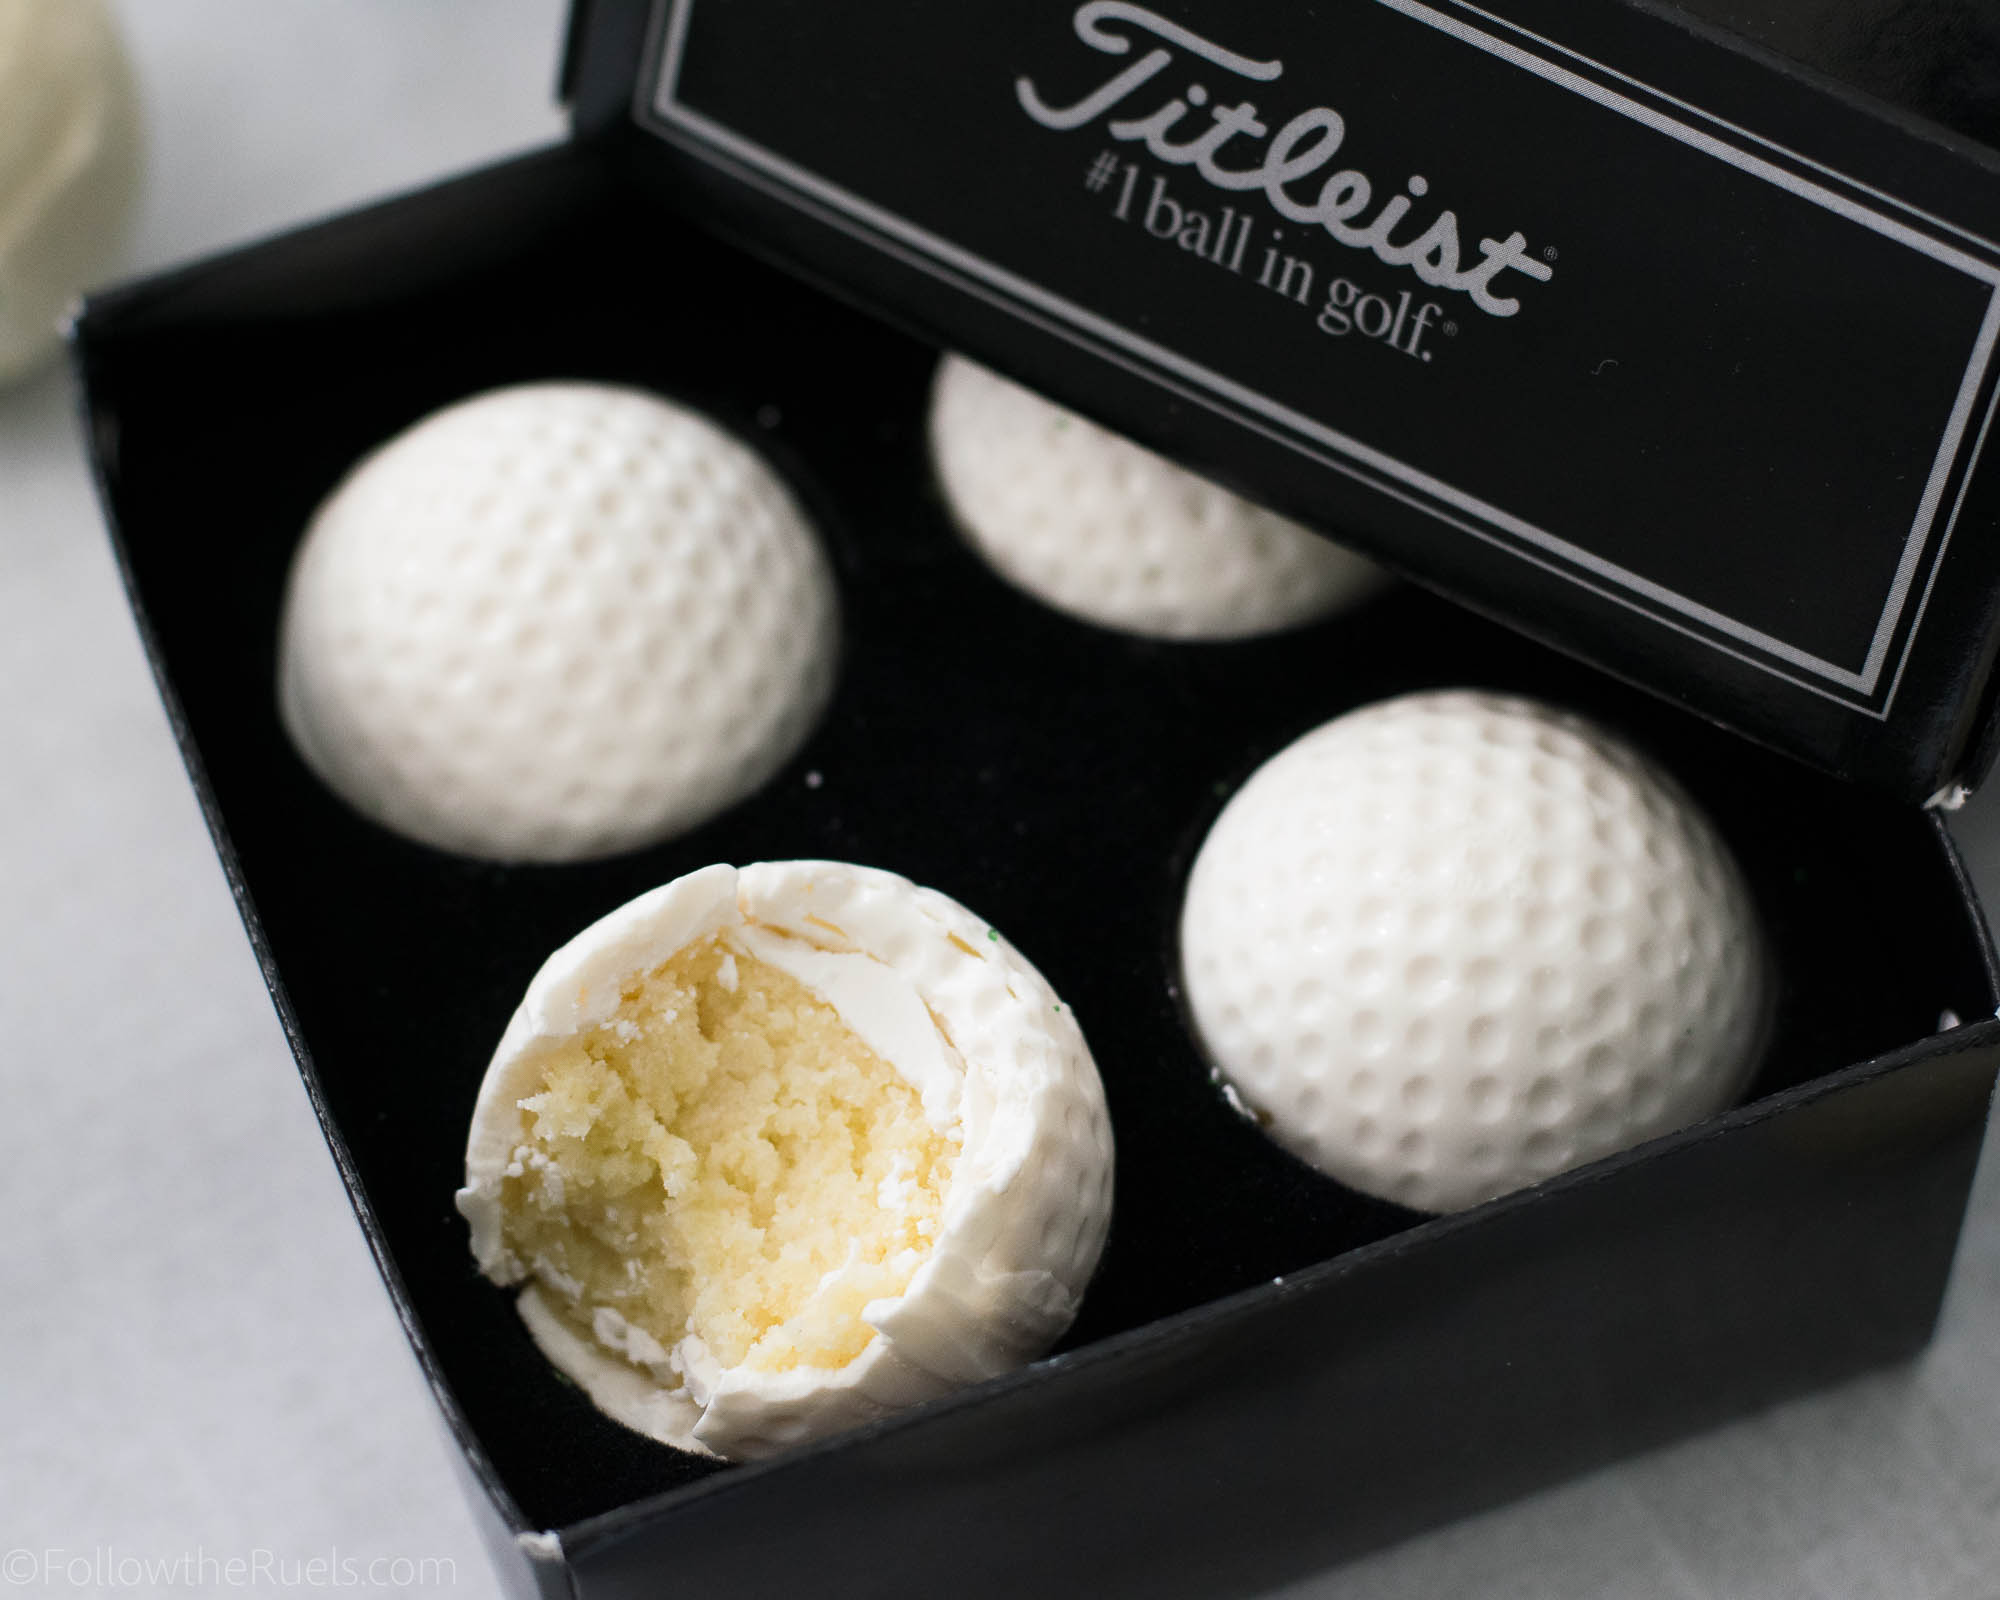
These gold cake balls are so cute on their own. I put them in one of Billy's golf ball boxes (I only recommend doing this if you cover the inside with parchment and use a brand new piece of foam) for presentation. But they would also be so cute as a cupcake topper or on top of a cake.

If you don't want to bake anything else, but want to step up the presentation, I recommend covering a platter with frosting and green sanding sugar to look like grass. Then place all the cake balls on top!
Although, I don't think Dad will care too much about presentation. He will just be excited to bite into the golf cake balls!
Supplies and Recipe
To make these cake balls, you will need a few supplies that you may not readily have on hand.
- Golf ball candy molds - depending on how many cake balls you want to make, you may want to get more than one since they only make 6 at a time.
- Bright white candy melts - 2 bags will cover about 18 balls
- Parchment paper or wax paper
- Microwave safe bowl and spoon (you probably have this already)
Supplies

Recipe
Golf Cake Balls
Total Time: 45 minutes
Makes 18 golf cake balls
Ingredients
- 1 prepared cake layer (approx 9"), 12 cupcakes, or 1 store bought loaf cake (approx 12oz)
- 1 cup of frosting (homemade or store bought)
- 2 packages of bright white candy melts
Supplies
- Golf ball candy mold
Instructions
- Crumble the cake or cupcakes into a large bowl until there are no large chunks of cake left.
- Stir in frosting 1/4 cup at a time until the mixture is moist enough to stick together under pressure. You may not need all the frosting.
- Spoon or scoop the balls and place them onto a sheet of parchment or wax paper. Roll the balls between your palms to smooth the surface. Make sure the balls are just slightly smaller than the mold.
- Follow the directions on the candy melt package to melt 1/2 a package at a time. Spoon the melted candy melts into half of the candy mold. Swirl the candy with the mold to cover the entire cavity up to or over the edge. Tap out any excess.
- Place the cake ball in mold, then repeat the candy melt process with the other half of the mold. Place the mold without the cake ball on top of the other half, aligning the edges of the mold so that they form a perfect seam. Press the molds together tightly and tap against the counter to ensure the candy from each side of the mold comes together.
- Transfer the mold to the fridge or freezer to set for 15-20 minutes.
- Remove from the mold and serve!