
How to Trace onto Cookies (Mother's Day Cookies)

This is part two of my Mother's Day cookie post. There was just too much to fit all in one post! Floral monogram cookies AND lean how to trace on to a cookie?! I think we would have all been overwhelmed. Plus, I think this technique deserves it's very own post since it can be used for so many different things: fonts, images, designs, patterns, etc. Anything you don't feel comfortable drawing freehand with icing, you can do using this technique to trace onto cookies!
But before you can decorate, you need some cookies! For these Mother's Day cookies I flavored my favorite sugar cookie recipe with a touch of lavender and a whole lot of vanilla bean.
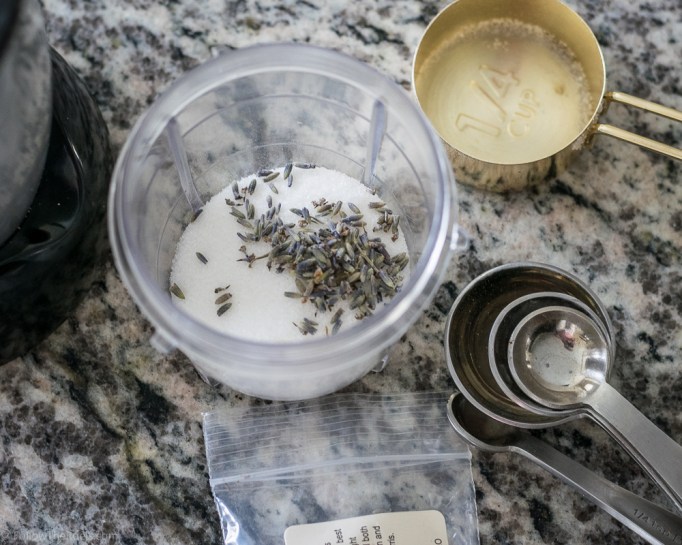
The resulting cookie was this subtly floral vanilla cookie that was so good. I was so afraid of going overboard with the lavender, that I just added a touch to the sugar before I mixed the sugar into the butter. I blended the sugar and lavender together so that each bite would have a very subtle hint of it.
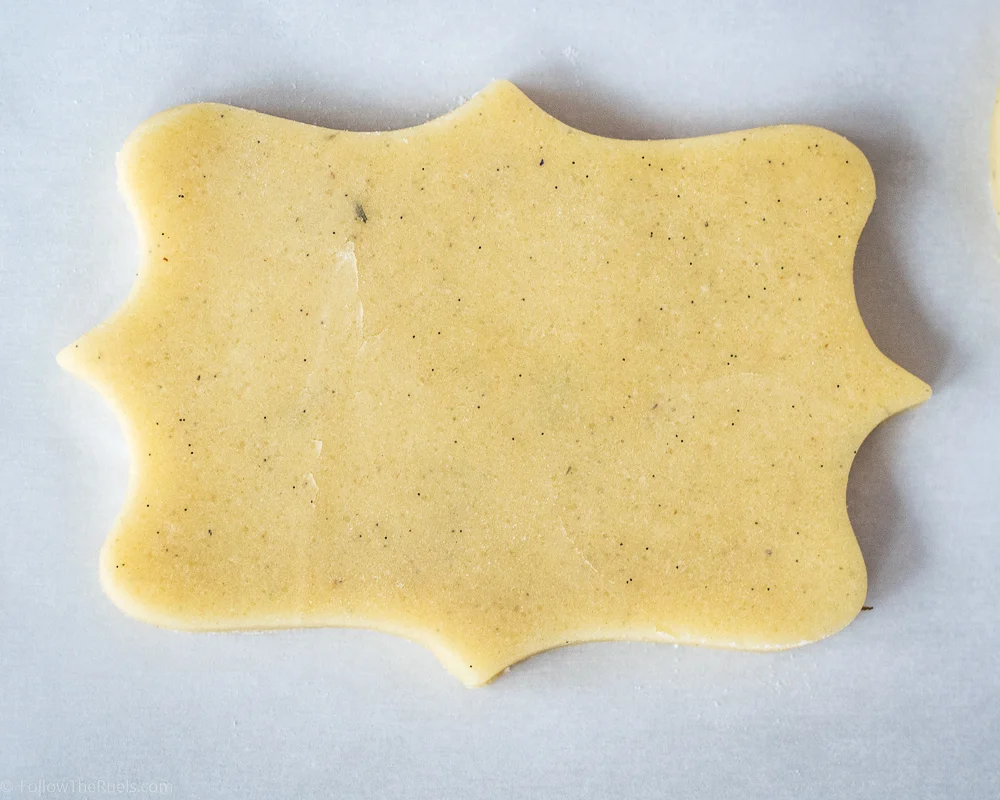
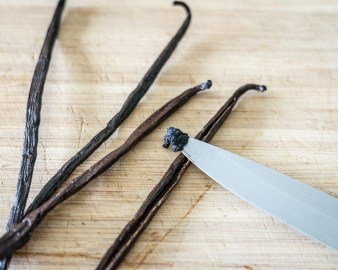
I didn't feel the need to hold back on the vanilla, however. I went all out! You can see all the lovely vanilla beans sprinkled throughout the dough. If you look closely, you can sort of make out pieces of lavender, too!
Okay, so now let's get to the reason you are here: learning to trace onto cookies!
It's simple and requires only a couple special tools that you may already have around your house or kitchen: tissue paper and a edible food marker.
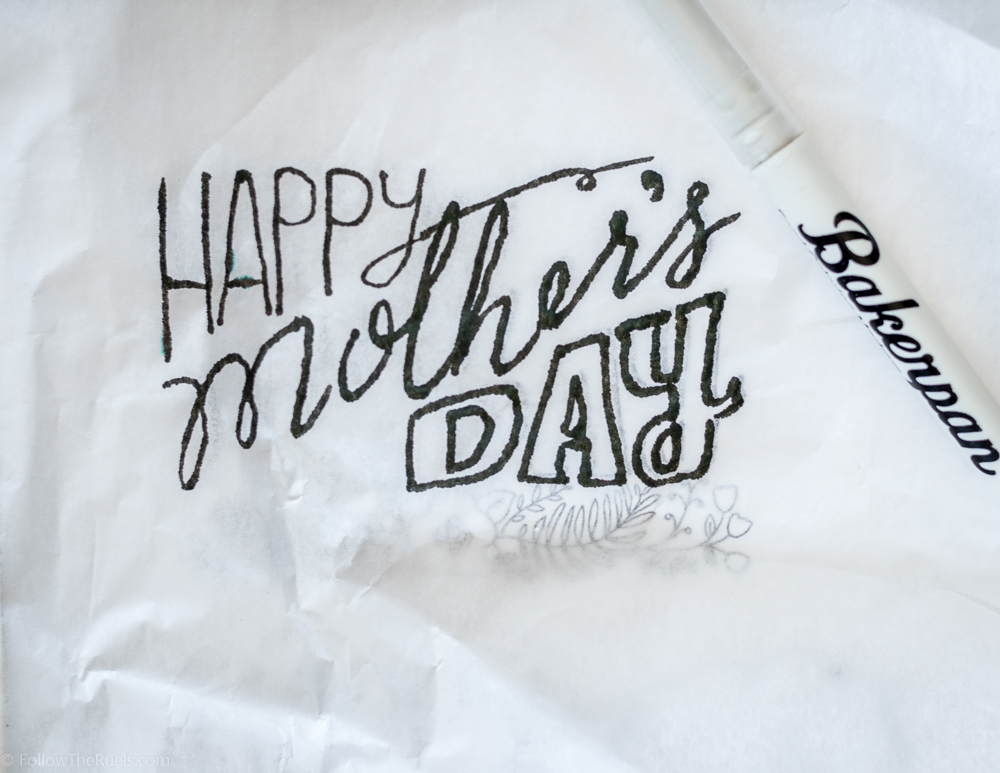
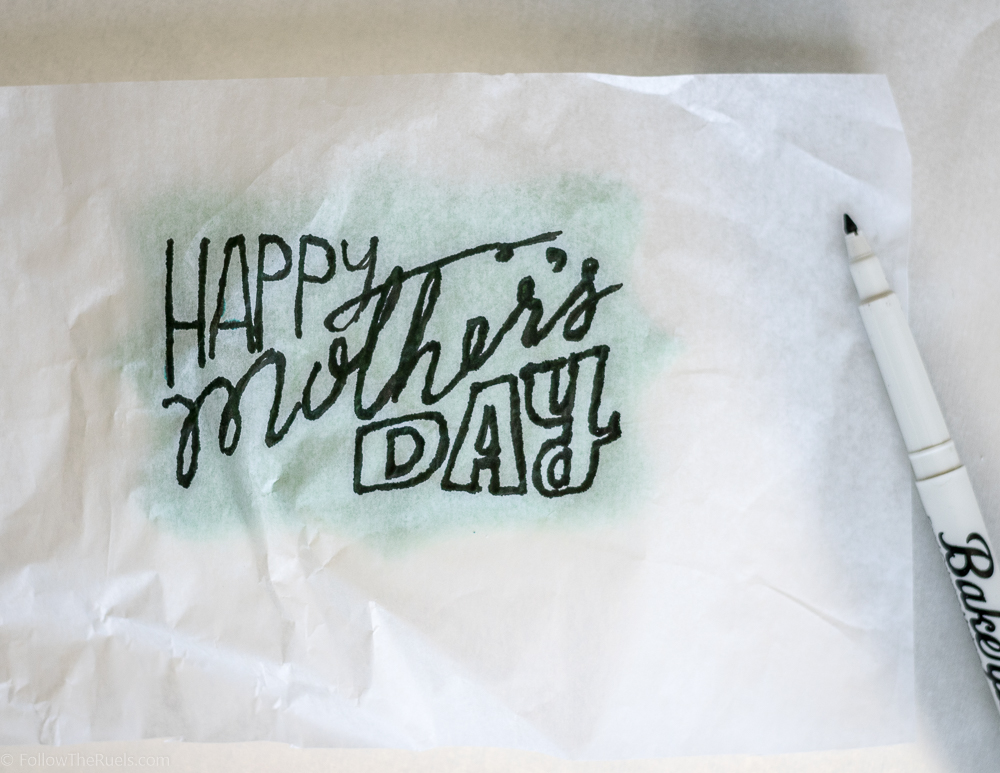
First find an image or text that you like and print it out onto normal paper. (I found this one on Google Images and thought it would fit perfectly on my plaque cookies.)
Top your printed image with a sheet of clean tissue paper. Then trace the image with an edible food marker.

Take the sheet of tissue paper with your image or font traced on it and place it onto of the cookie, making sure that it's perfectly situated.
Trace over it again with the edible food marker. Don't press too hard because you will risk tearing the tissue paper. You should be able to trace two to three times with the same tissue paper.

Viola! The text or image has now transferred onto the cookie! From here you can just trace over the ink with your icing.
I say that like it's no big deal. Tracing the image with the icing is probably the hardest part. I still have yet to master writing cursive letters with icing.
Since the original image had some flowers on the bottom, I added some flowers to my cookies.
Now they go perfectly with the other floral monogram cookies I shared on Wednesday.

Wouldn't you mom love these cookies? Well, even if you are reading this far from Mother's Day I hope you have learned how to trace text or an image onto your cookies. I promise, this trick will come in really handy!
Recipe
Ingredients
1/2 cup granulated sugar
1/2 tsp lavender
- 1 cup (2 sticks) unsalted butter, softened
- 1/3 cup powdered sugar
- 1 egg
- 1 tsp vanilla extract
- seeds of one vanilla bean
- 2 1/2 cups all purpose flour
- pinch of salt
Instructions
- In a food processor or spice grinder, blend together the granulated sugar and lavender.
- Place the butter and sugars in the bowl of a stand mixer. With the paddle attachment, beat the butter and sugar until soft and fluffy, about 1 minute.
- Mix in the egg, vanilla, and vanilla bean until completely incorporated.
- Mix in the flour 1 cup at a time until all flour is combined.
- Turn dough out on to a sheet of plastic wrap. Wrap up and place in the fridge until ready to use. Dough can be rolled out right away if your in a pinch.
- When ready to bake, preheat oven to 350 degrees.
- Place a piece of parchment paper down on the counter top. Roll dough out on the parchment paper, using minimal flour to keep the rolling pin from sticking.
- Cut dough out to the desired shapes. Bake for 10-15 minutes until just barely brown around the edge.