
Gender Reveal Cookies

Gender reveals are all the rage these days. From balloons to confetti to fireworks, everyone seems to have a different take on this gender reveal trend.
Obviously, my favorite gender reveal ideas are those involving food! So even though we aren't having a formal gender reveal I thought it would be fun to create some sweet treats to spread the fun news!
And, if I am being honest, I have been thinking up fun baking-related gender reveal ideas long before I was ever pregnant!
So first on the schedule are these gender reveal cookies! They can be as simple or as elaborate as you'd like because it's what's on the inside that counts!
Recipes and Supplies
To make these cookies you will need:
At least 1 batch of my favorite sugar cookie recipe (will make 2 gender reveal cookies and 10-12 additional cookies depending on size and thickness)
- 1 batch of royal icing to cover all the cookies
- A egg wash (1 egg + 1 tsp water)
You will also need:
- Cookie cutters shaped like baby onsie
- A pastry brush
- Sprinkles in blue or pink
- Piping bags or small zip top bags
- Food coloring
- Scribe tool or toothpicks

How to Make Them
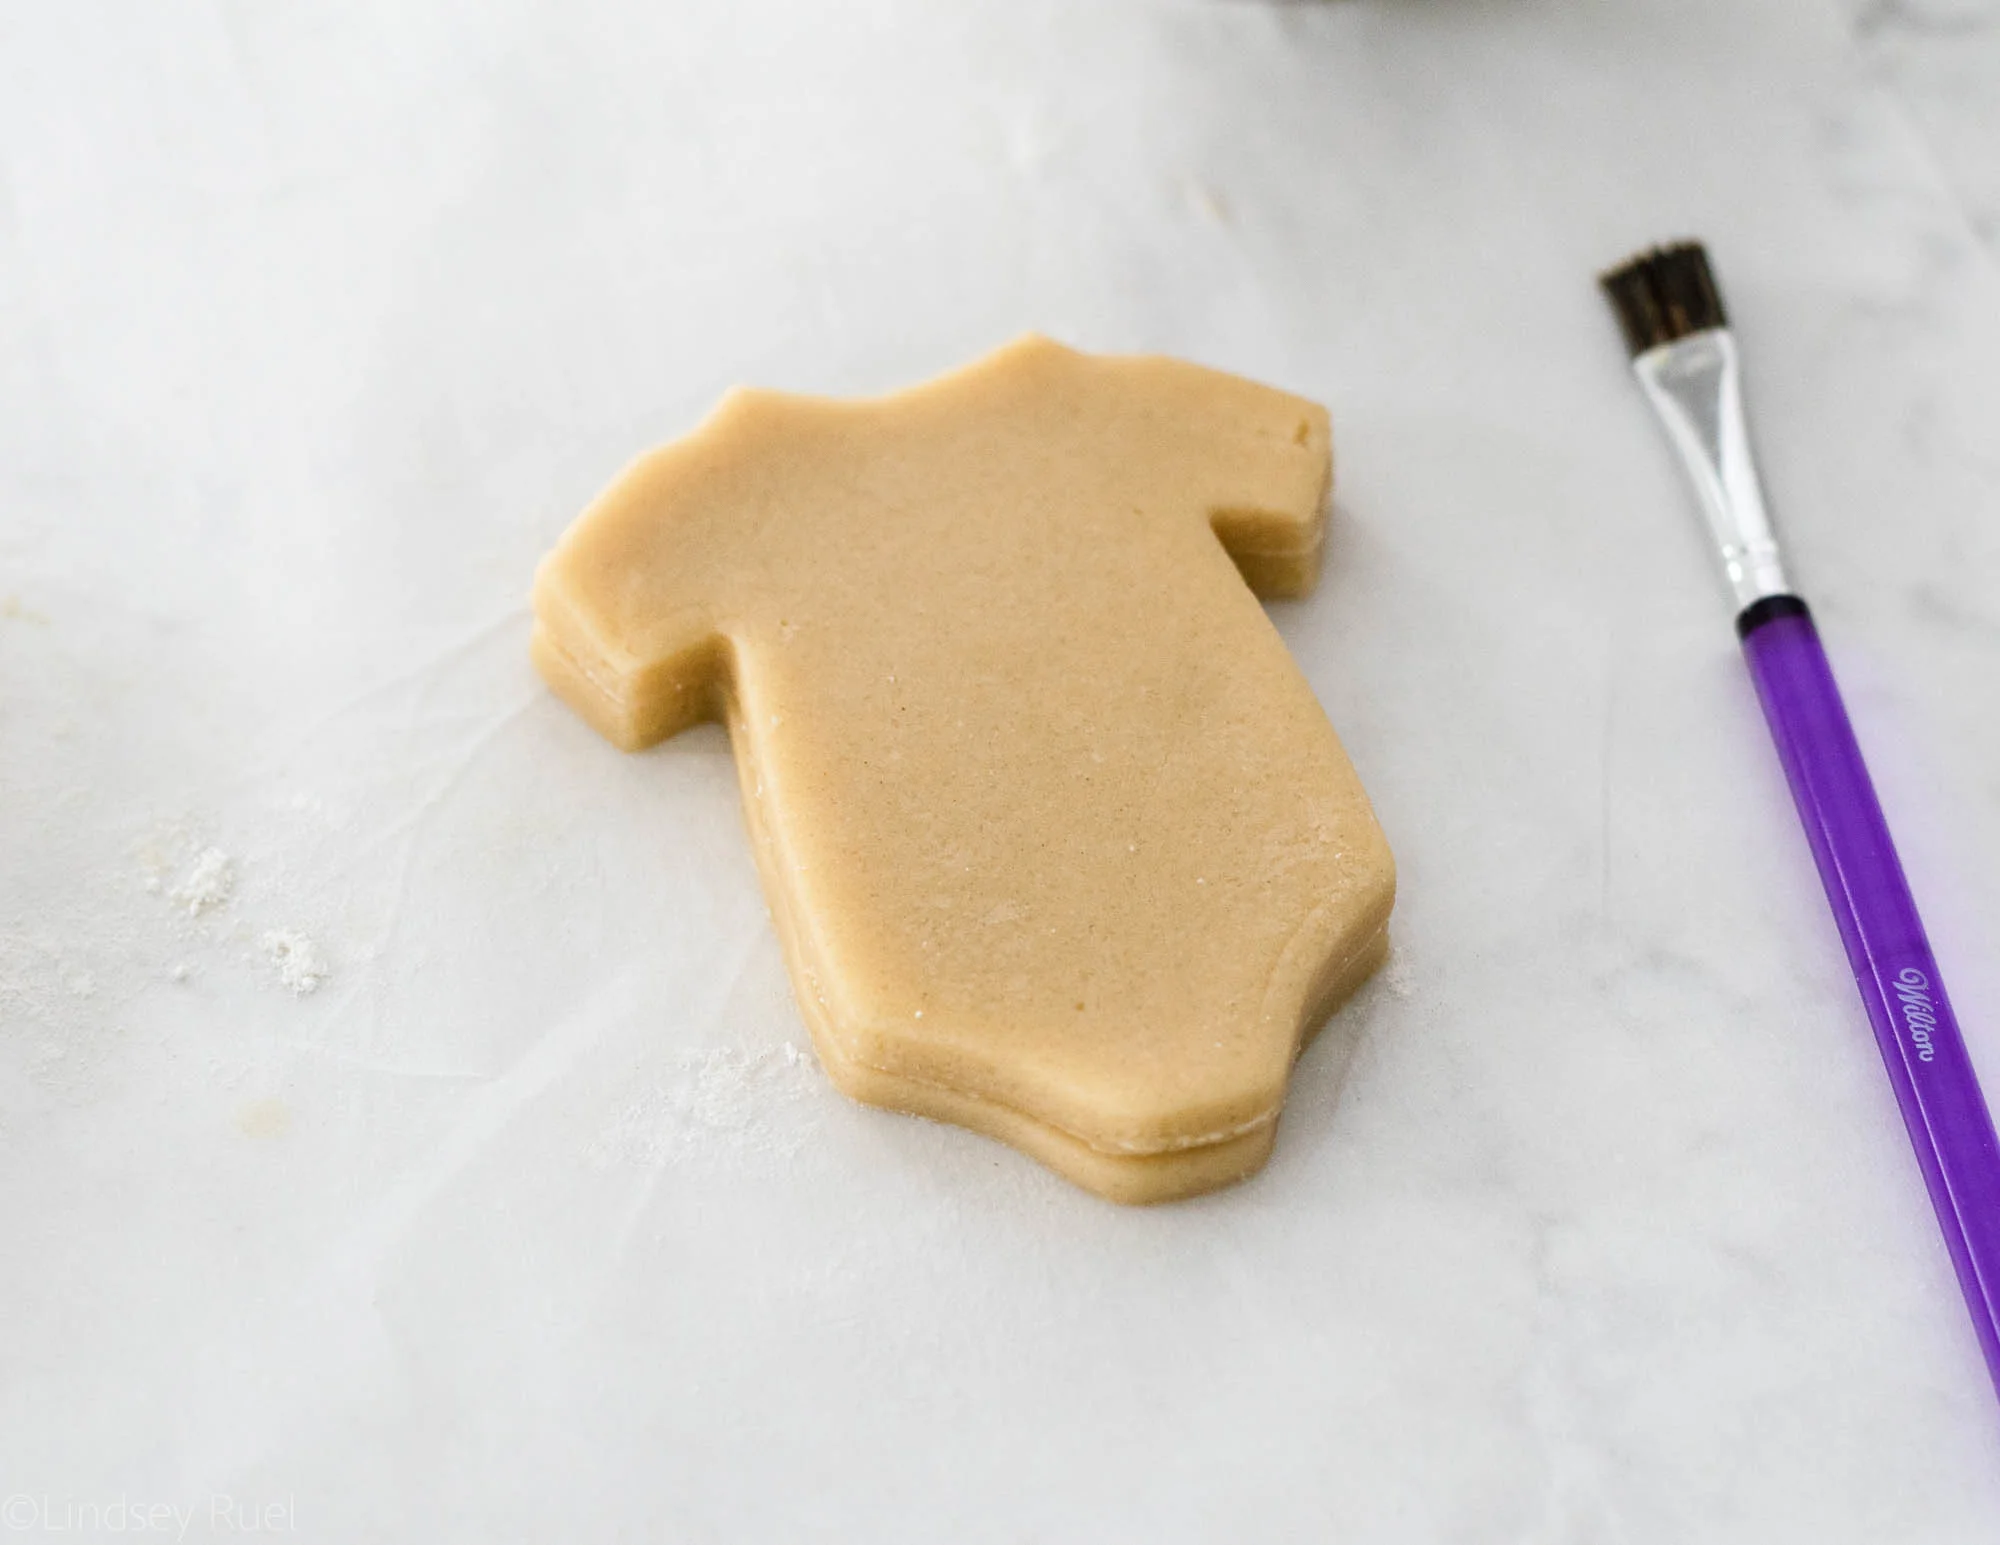
Start by making the sugar cookie dough. Chill the dough so that it's a bit firm, then roll out as usual. Cut the dough to the desired shape and immediately transfer to a baking sheet or plate and place back in the fridge to chill.
Each of the gender reveal cookies will actually be comprised of three layers of dough. Two will be baked together, the other will be baked separately and "glued" on top with icing.
It is important that these pieces stay chilled so that their shape isn't distorted. Because the pieces all need to match together in the end, you want them all to be the same shape and size.
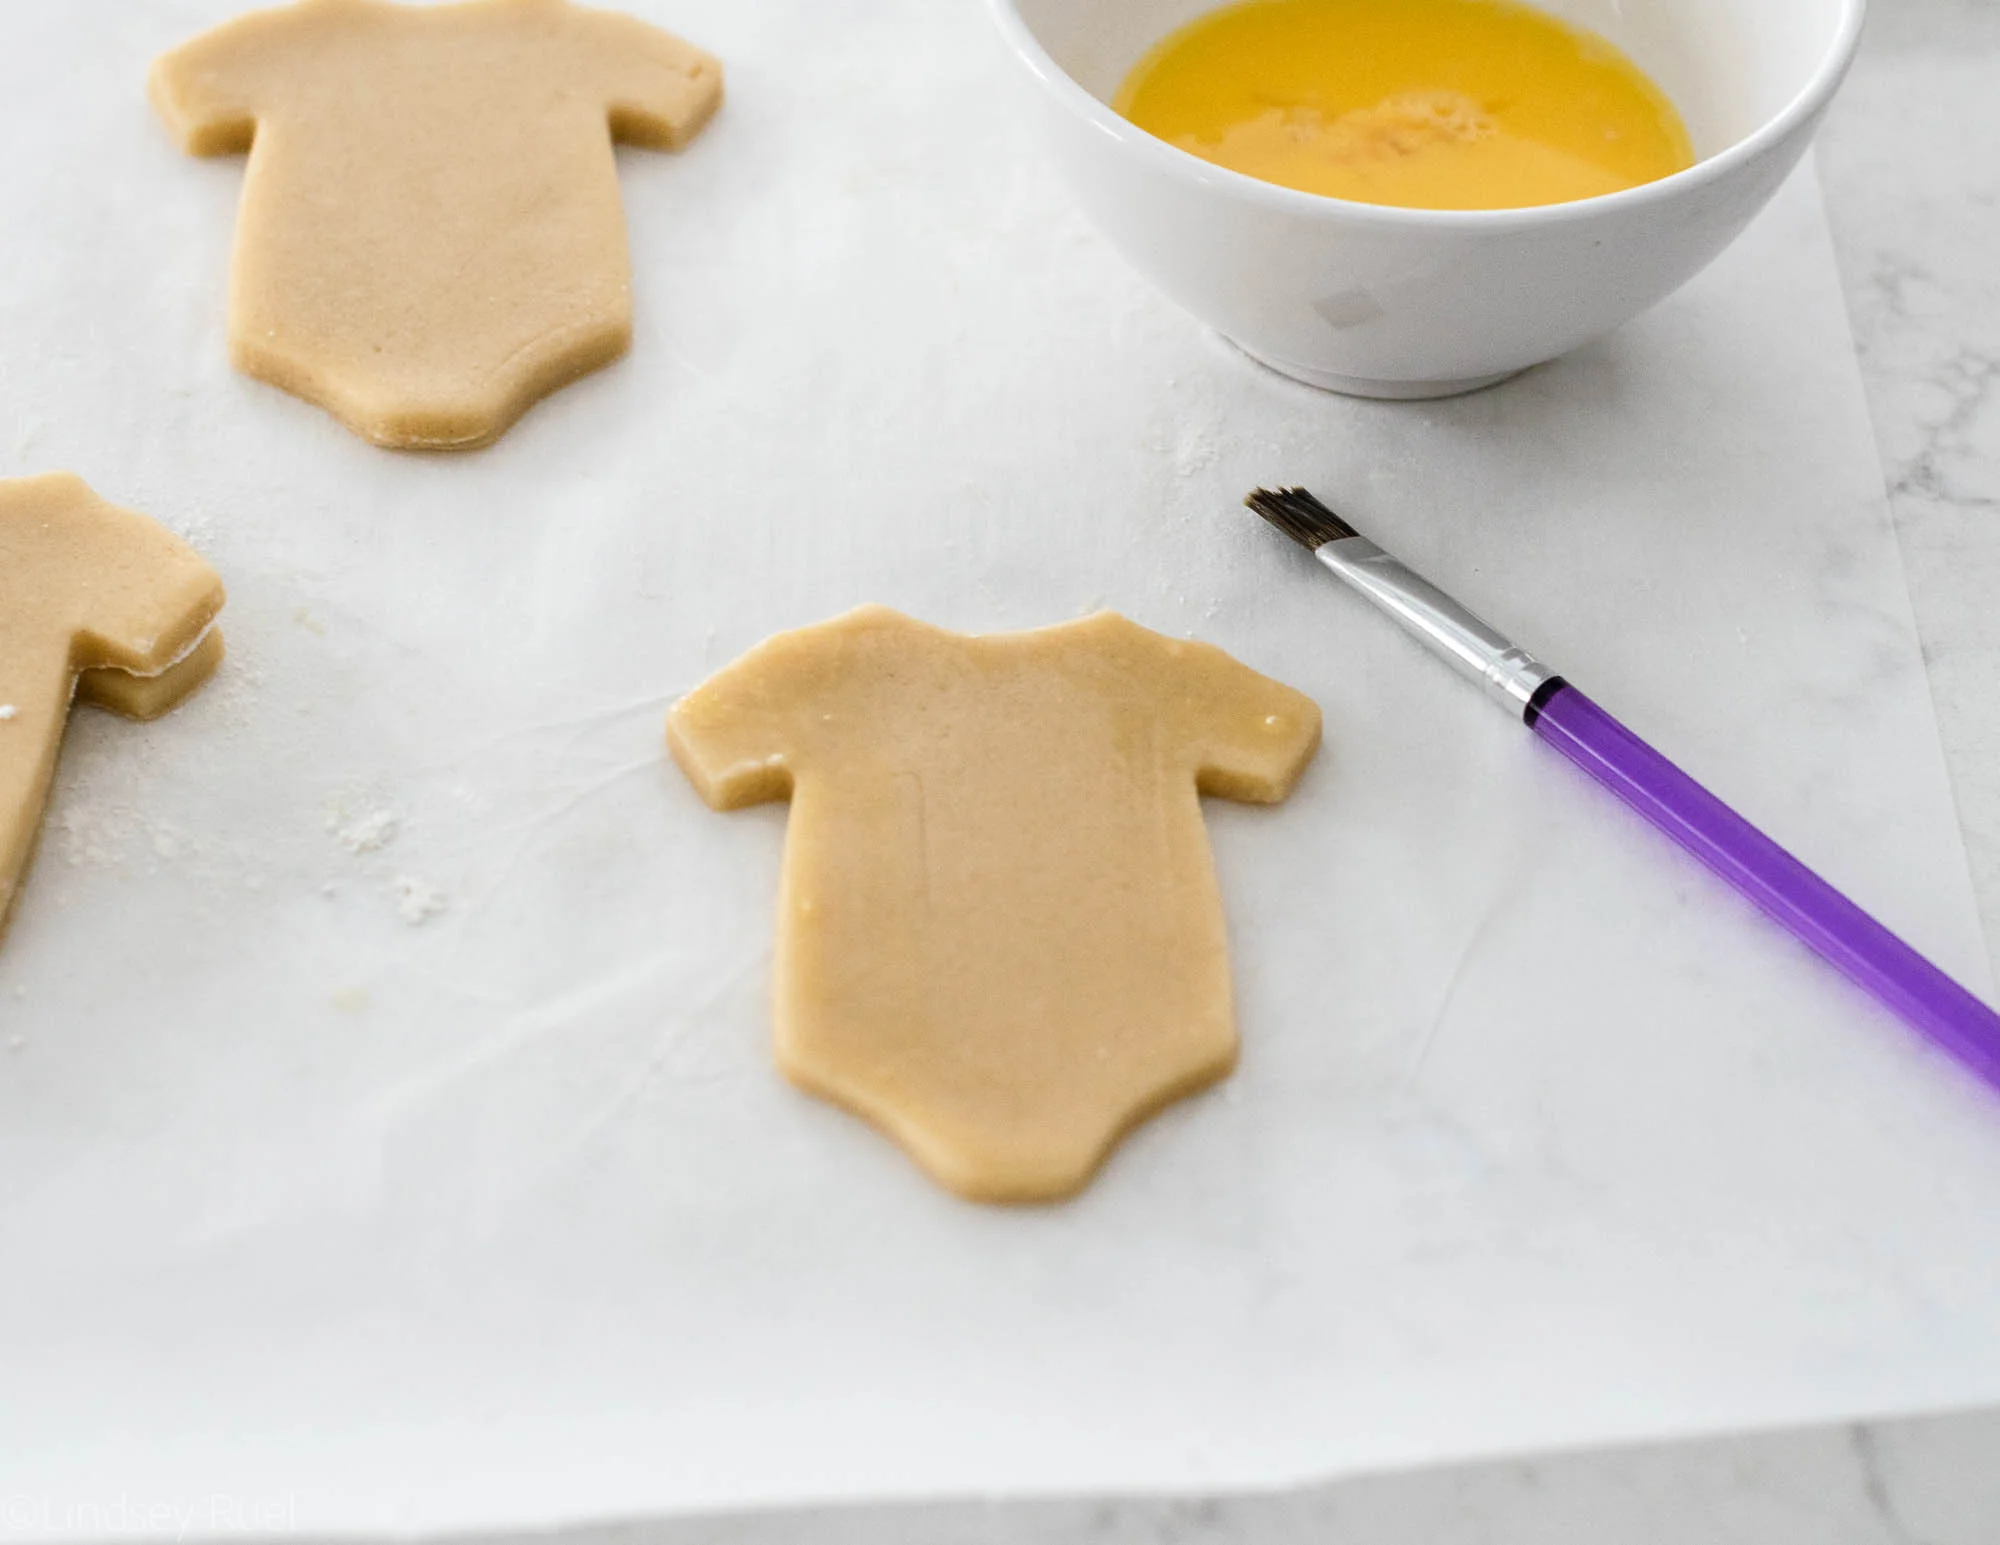
"Glue" one piece of rolled out cookie dough onto the other by brushing a bit of egg wash around the edges.
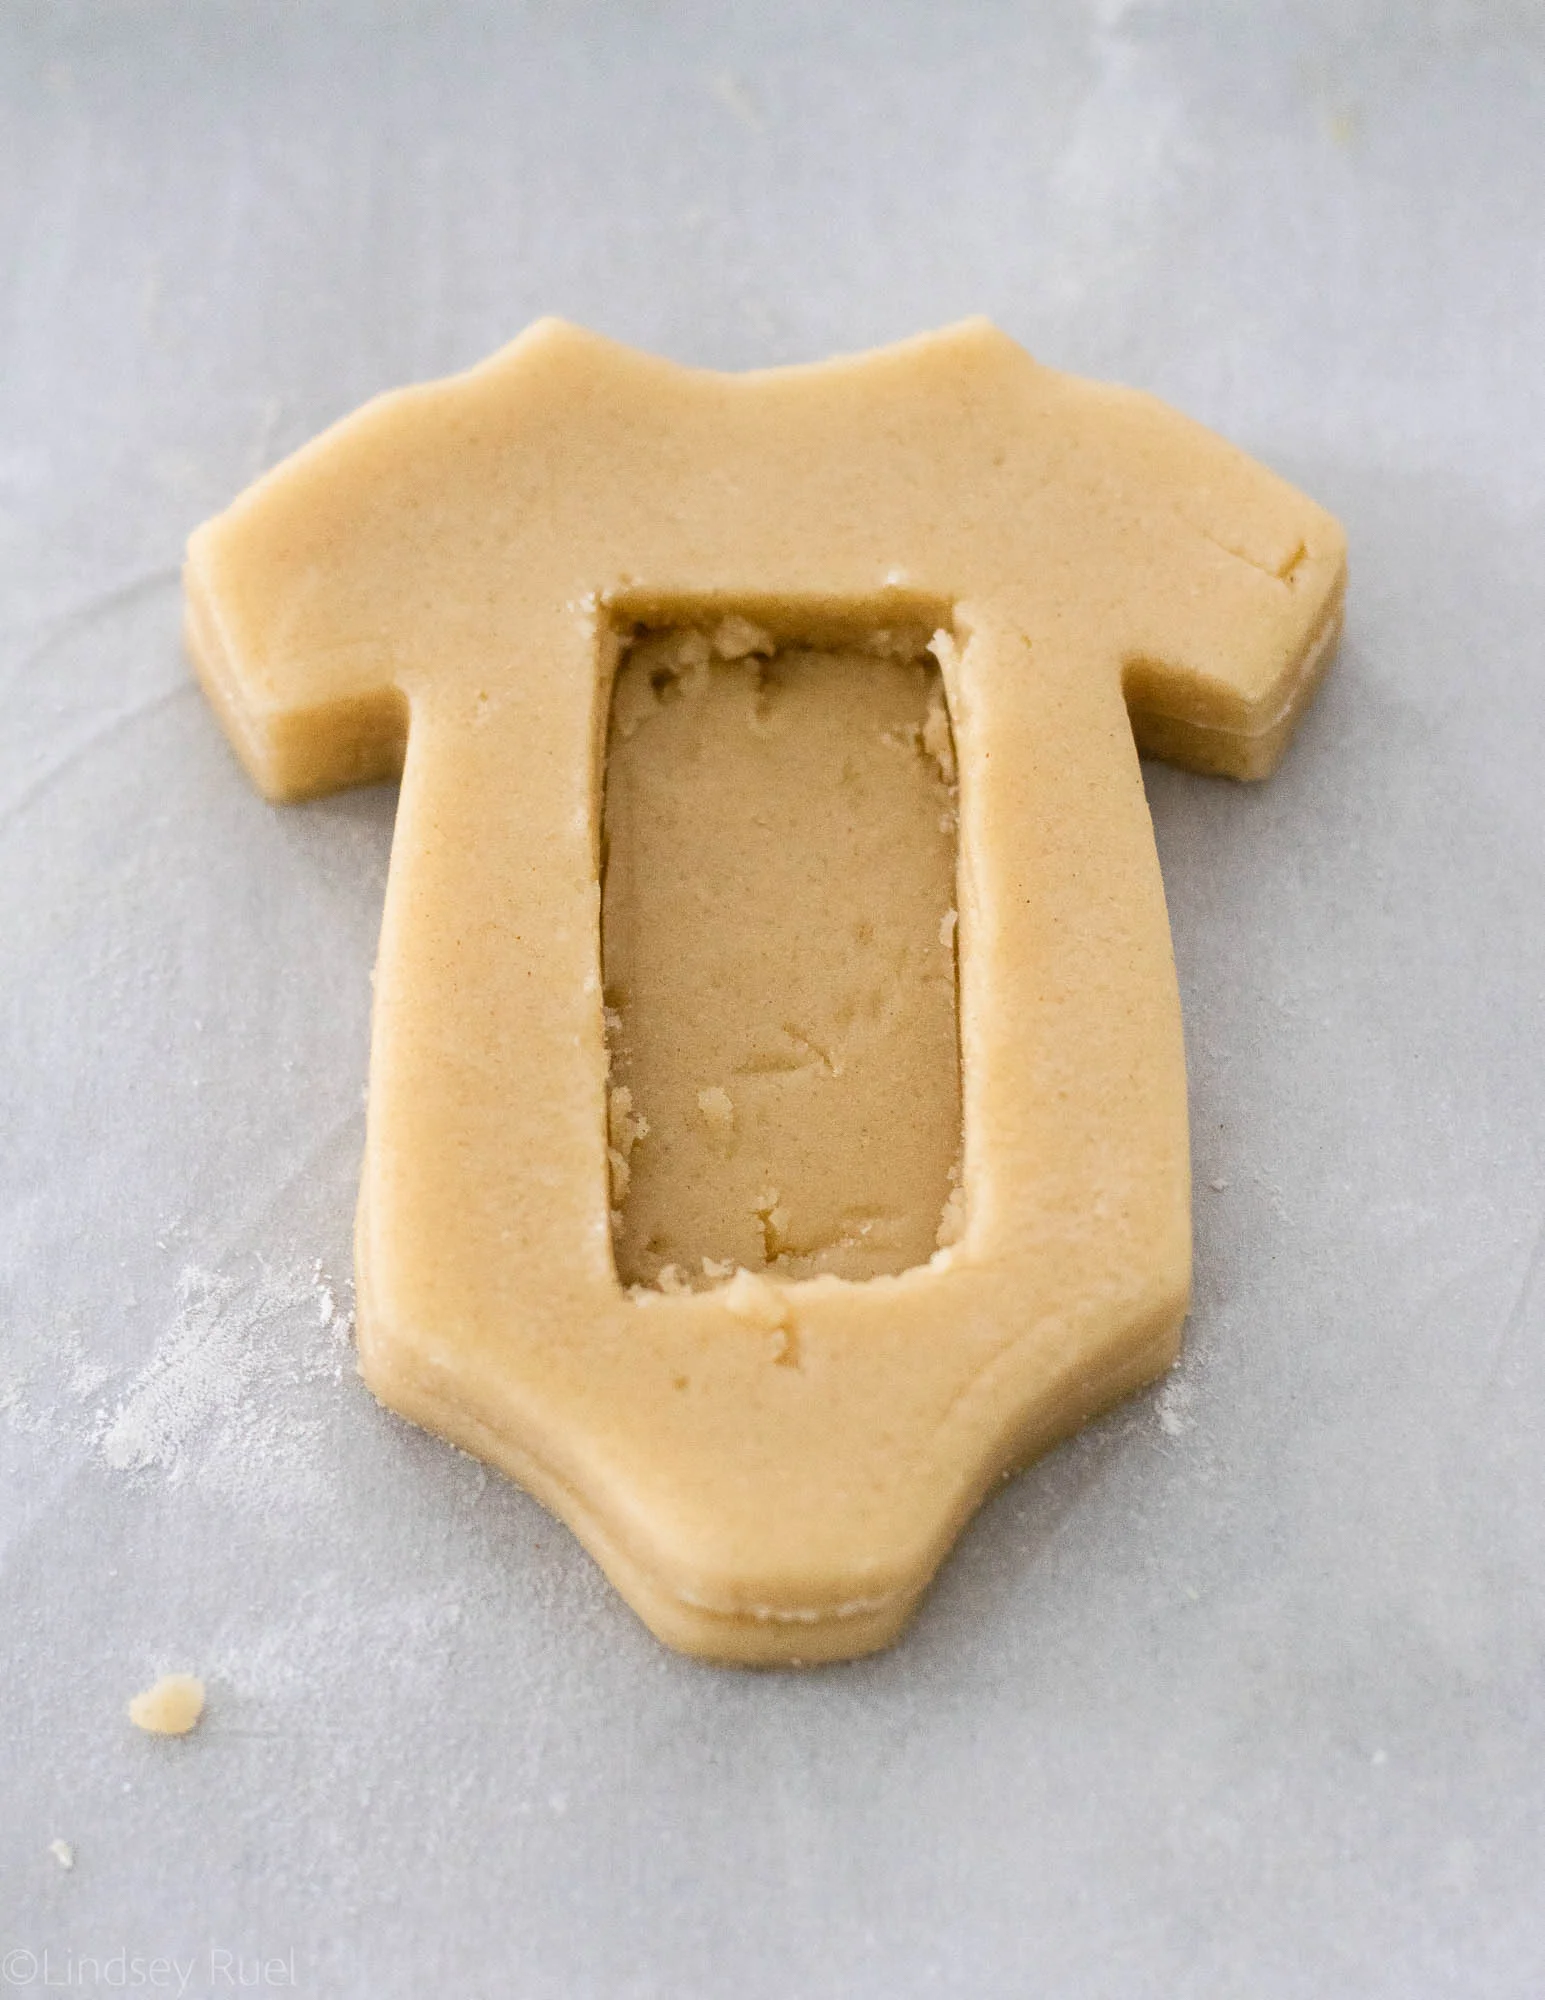
Place another piece of dough on top of the other, then cut out a hole to fill with sprinkles later.
Alternately, you can cut out a hole in the top layer of dough before placing it on top of the bottom layer. Just be careful not to distort the top layer when moving it.
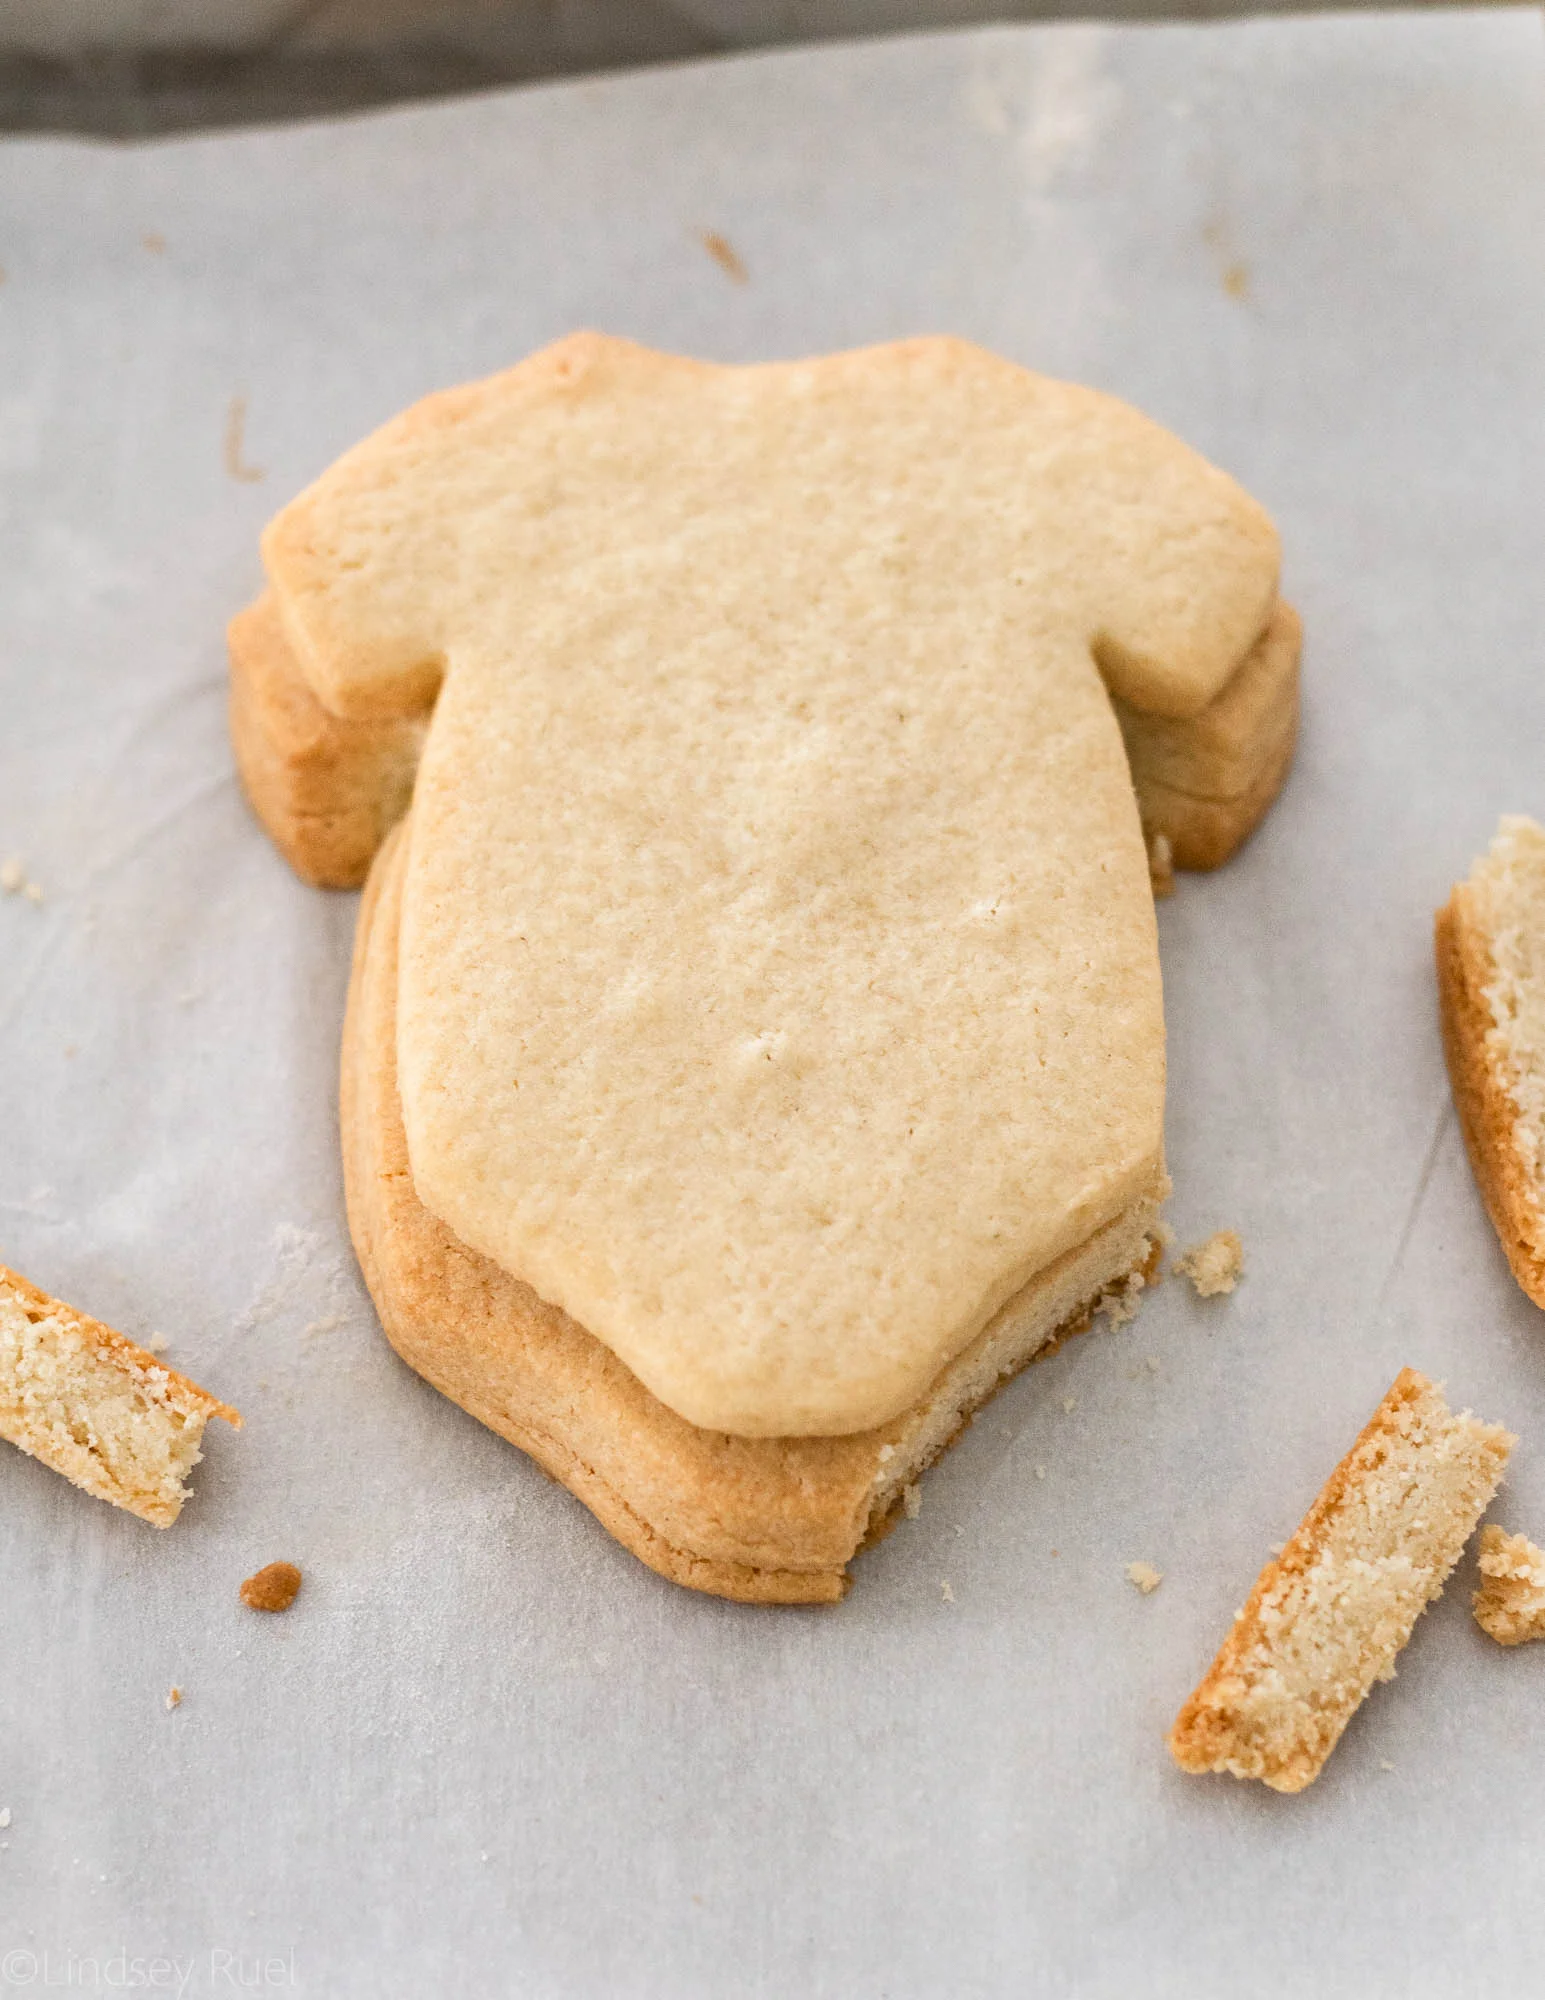
Bake the double layer cookies separately than the single layer because they will take a bit longer to bake.
Also, because its a thicker cookie, it may expand more than your single top layer.
Don't fret!!
Use your top layer as a guide and cut around the thick bottom layer while the cookie is still hot from the oven. Polish any rough spots with a zester to get them to look like a perfect match.
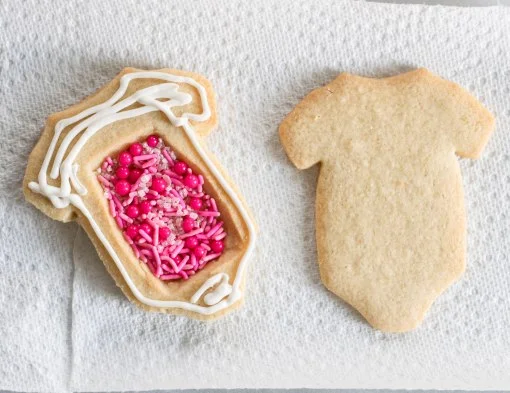
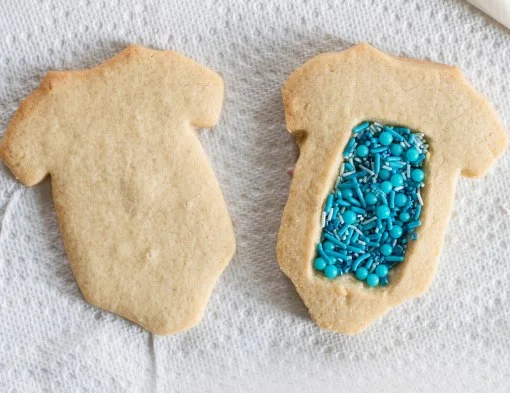
Now it's time to fill the cookies with sprinkles!! Obviously, you will need to know what color to fill first, then pour in enough sprinkles to fill the cavity.
Add some stiff or piping consistency royal icing around the edges and then place your top cookie right on top. Press the cookie down firmly to make sure it's nice and secure!

You can immediately start to decorate the cookies once the top layer is in place.
For these cookies, I kept it pretty simple. I outlined the onsie with white icing, then flooded it with flood consistency icing.

I immediately went in with blue and pink flood consistency icing to add some dots and stripes.

And there you have it! Super fun and cute gender reveal cookies!
I recommend making at least 2 so that both parents can open them at the same time.

You can even make these for twins!

I had so much fun making these, but of course, I'm not giving our gender away just yet! I have a couple more fun reveals planned this week so you will have to wait and see!