
Snow Globe Cookies

These cookies will bring out the inner child in all of us. There is just something so fun about about playing with your food, don’t you think? And these 3-D snow globe cookies are just begging to be played with!
After making these snowflake cookies, I knew I could do something really fun with the same sugar glass effect by making a “window” for a snow globe.
The “window”, which is of course made with sugar, is placed on top of a snow globe-like background and the void is filled with white sprinkles that move around like the snow in a snow globe.
How to Make Them
Like the stained glass snowflake cookies I shared not too long ago, these cookies start with sugar cookies, cut into shape, with a void cut out to fill with molten sugar.

Unlike the snowflake cookies, these cookies have three pieces.
The first piece is a cookie cut out into the shape of a snow globe. The other two pieces are the same snow globe shape with a circle cut out of the middle.
To ensure that the cookies stay the same size and shape, it is very important that all the cookies are rolled out to the same thickness (use rolling pin bands). Then, before cutting out the center of the snow globe, transfer the cut out snow globe to a baking sheet, then cut out the center circle. This will ensure that the shape of the circle doesn’t get distorted.
It also helps to have the dough as chilled as possible which will also limit the distortion.

Next, mark the opening of the snow globe onto the back cookie with a food safe marker so you know where your design needs to be.
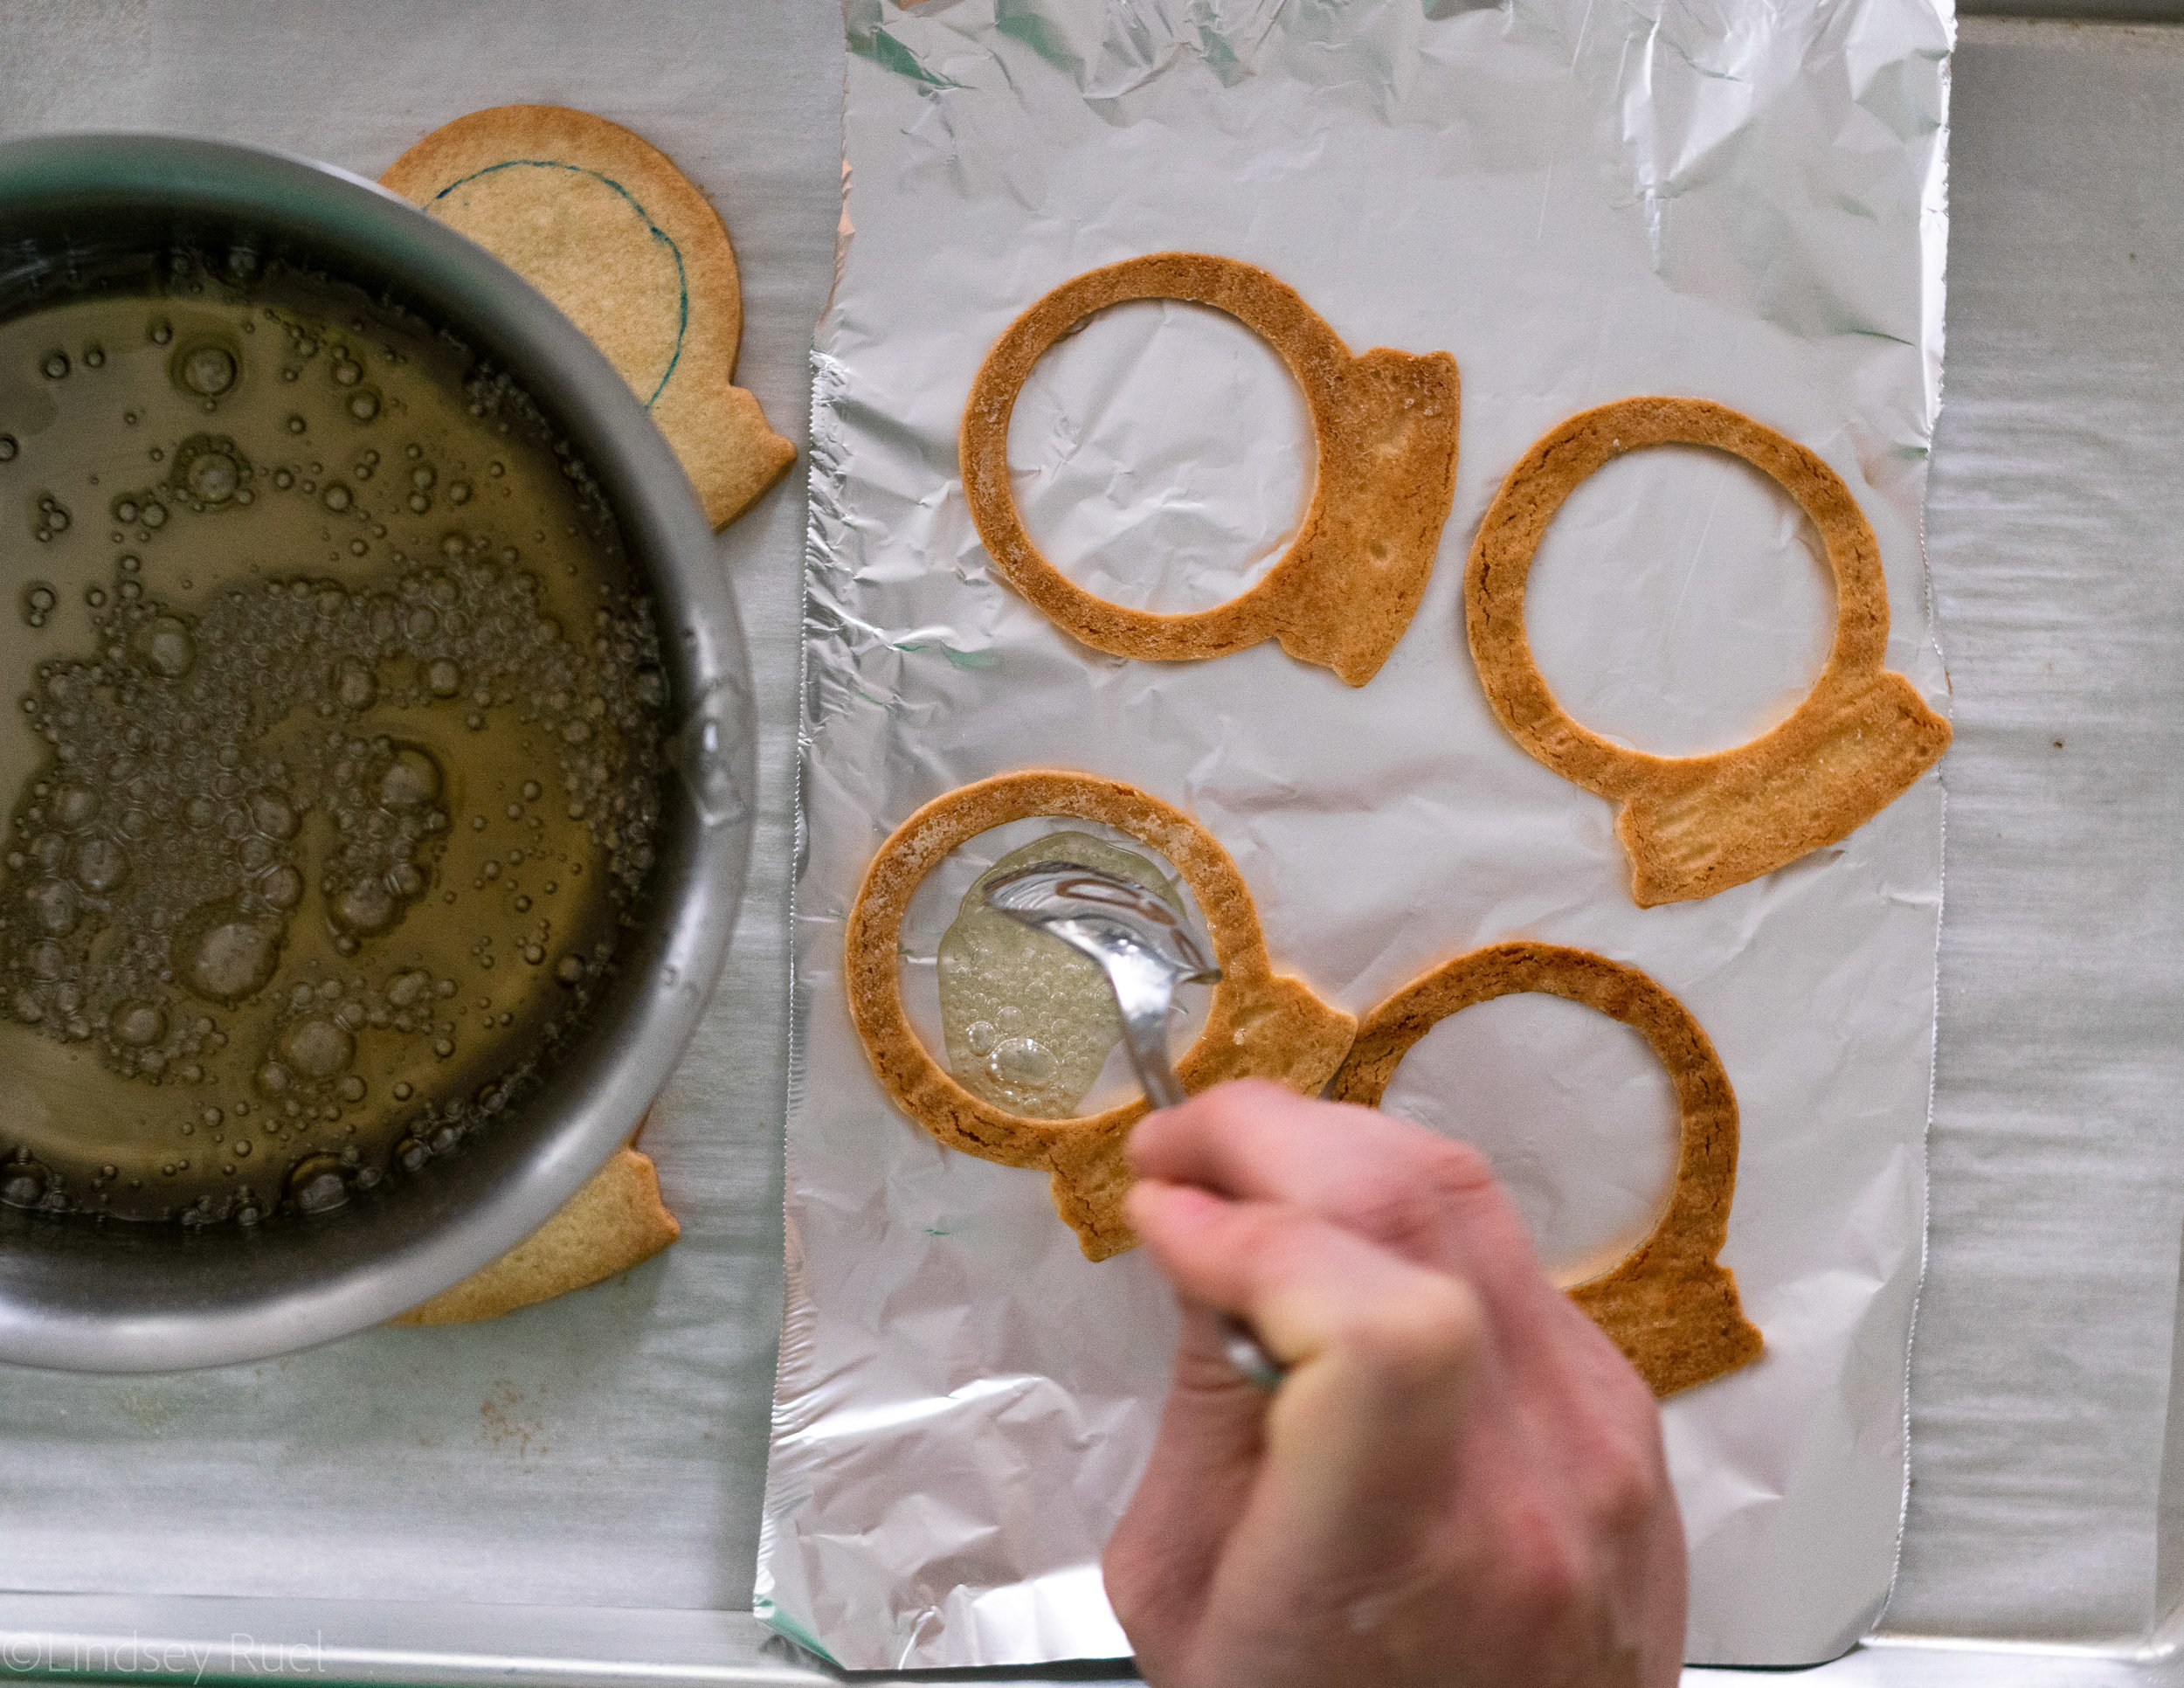
Then, lay whichever layer you have decided to be the top of the snow globe face down on a piece of tin foil. Spoon the molten sugar into the void, making sure it reaches the edges.
Let the sugar cool completely before removing it from the foil.
Tip: Use a kitchen torch to pop any bubbles on the surface. You may also find that the sugar directly in contact with the foil will be a little cloudy once it has completely hardened. To make it shiny again, use a torch (or even a lighter) and lightly pass over the sugar which will re-melt that top layer slightly and make it a bit shinier.


Now for the decorating!
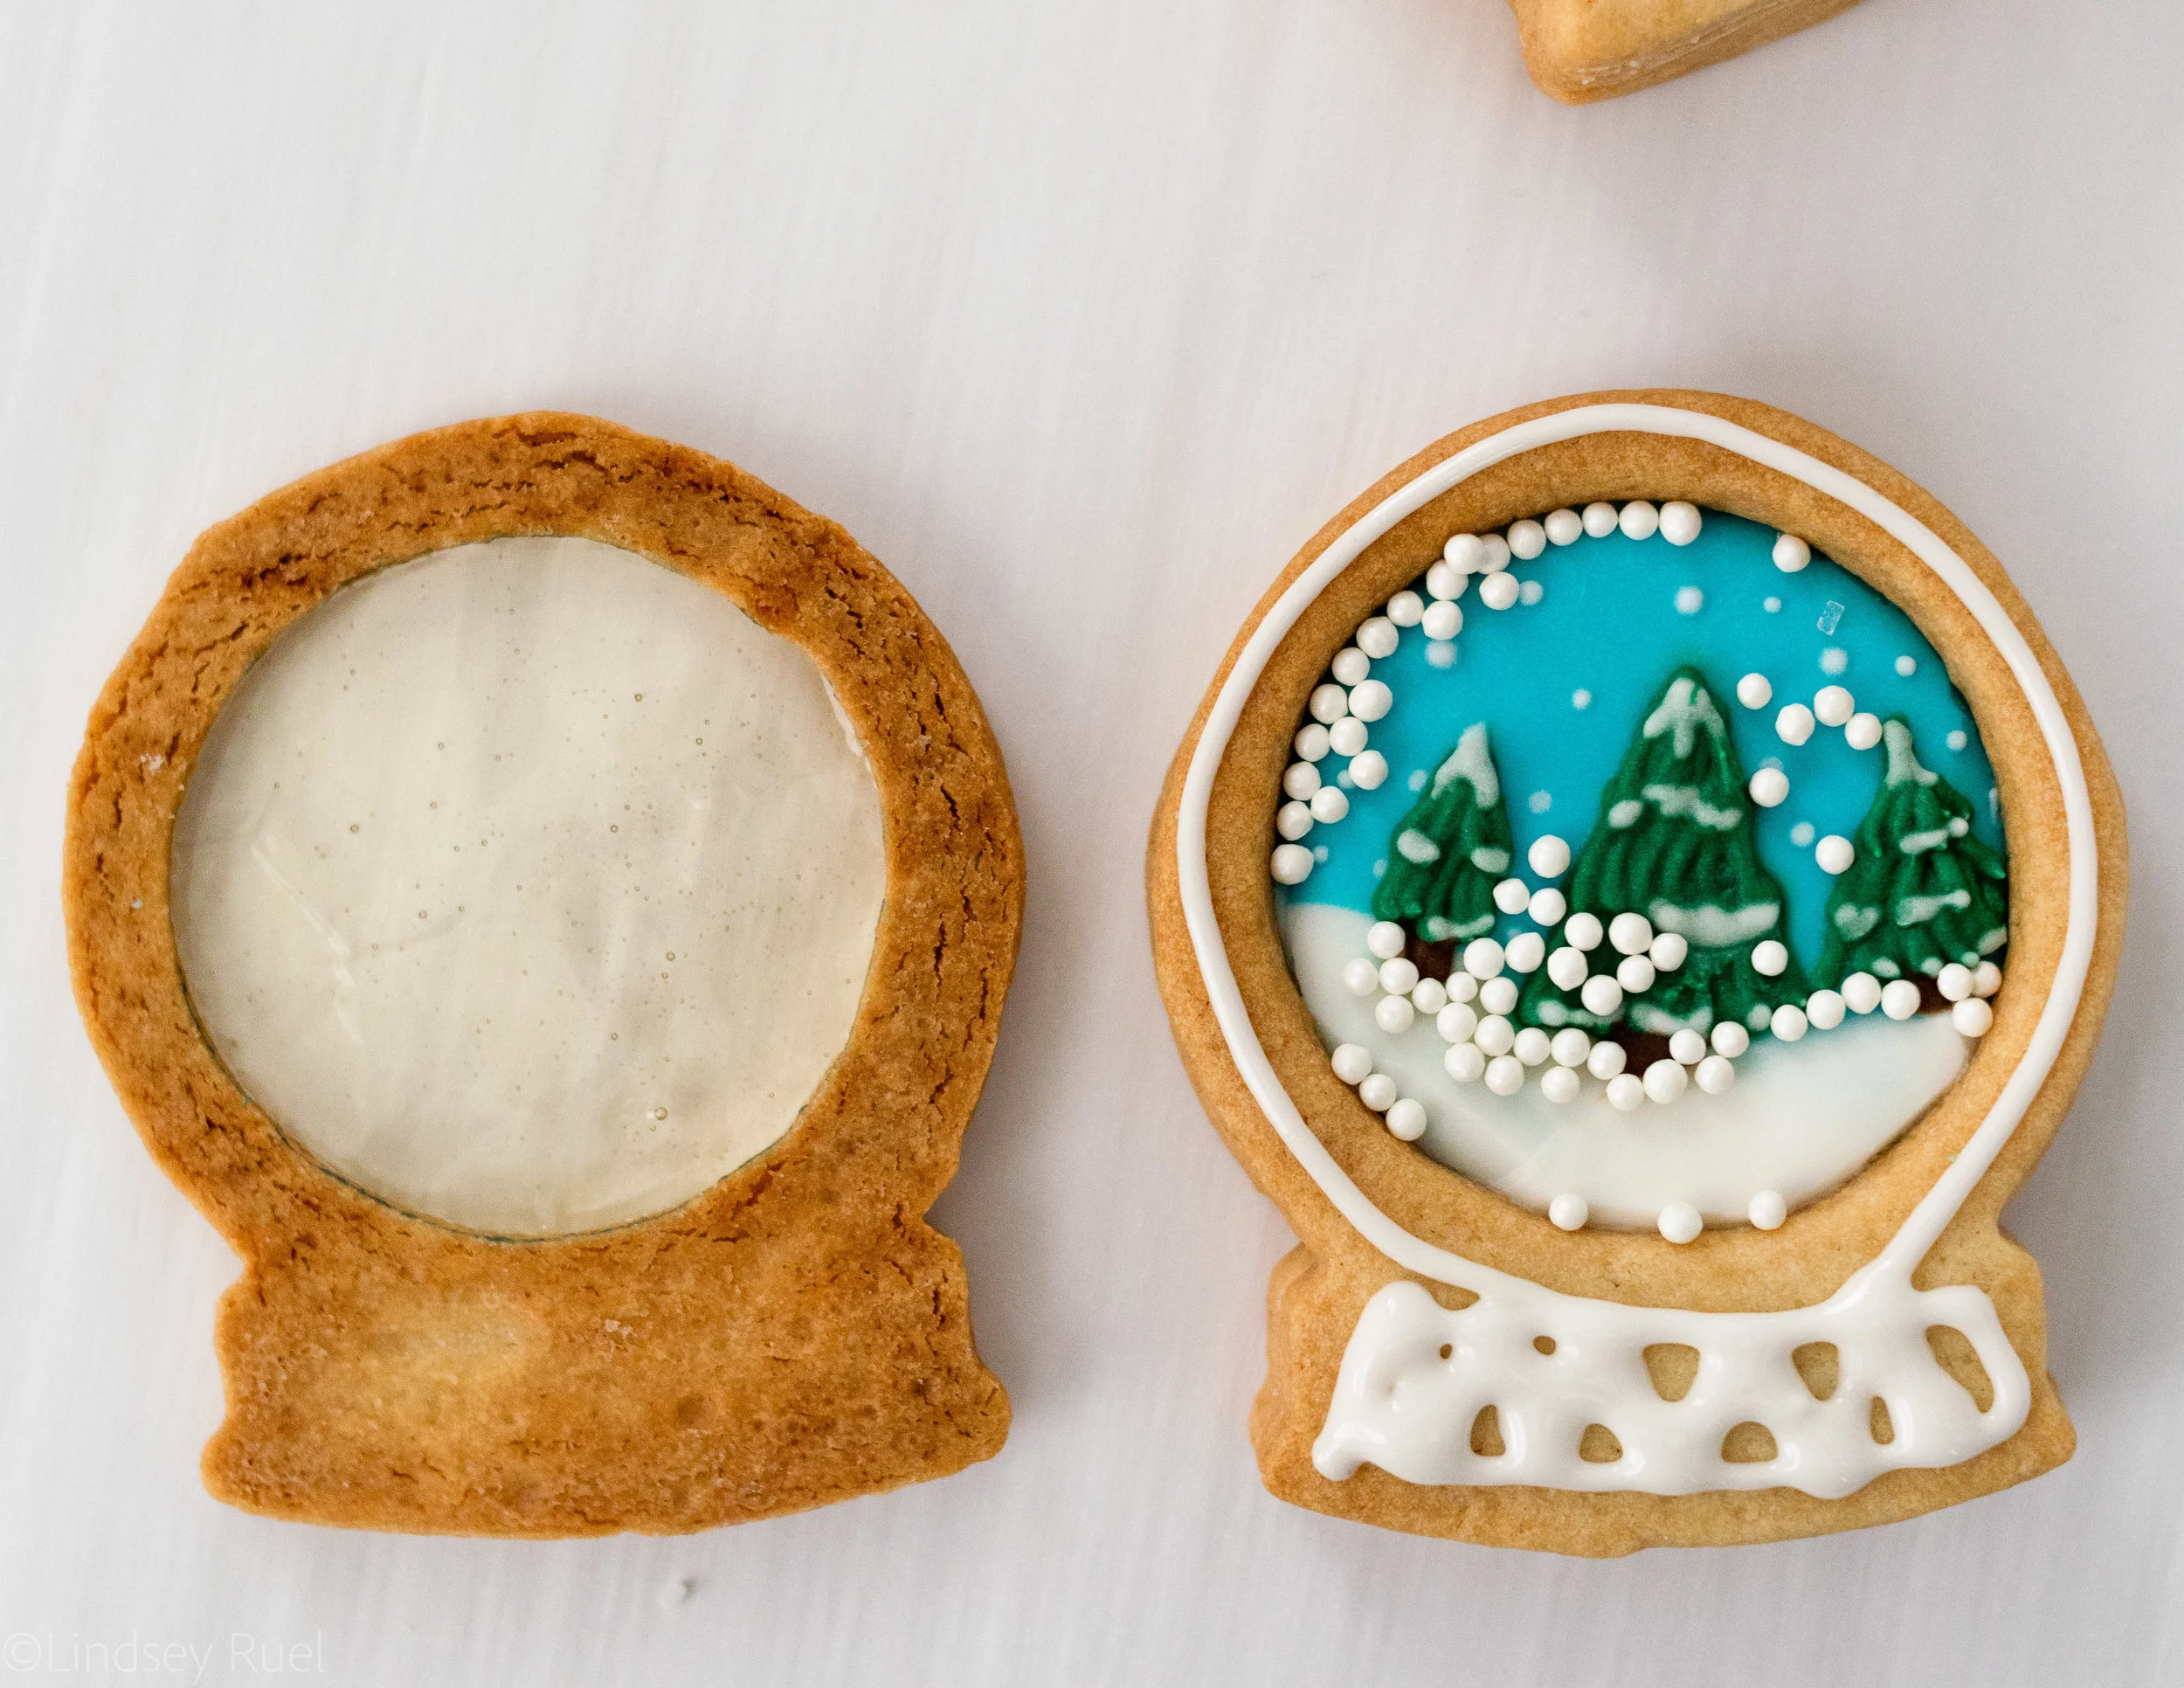
Since you marked out the opening of the snow globe, you know exactly where to pipe your background.
For these cookies, I made a simple snowy tree setting by first piping the background in a light blue, then some white “hills” and tress on top.
It is important to work relatively quickly on the background because you don’t want it to be completely hardened when you add the next layer. If you need the background to be completely dry before adding any additional details, do so once the second layer is attached.

To do that, pipe a bit of icing around the edge of the cookie and stick the second layer (which doesn’t have any sugar glass in it) on top. Press down firmly to make sure that it is completely sealed.
If you need to, add some icing in any void(s) around the edges.
Then just let the entire cookie dry for at least 4 hours so that all the icing has a chance to set before adding the sprinkles and closing it up for good.
Once you are ready, repeat that same process by piping some icing around the edge and pressing the top layer on.
Oh yeah, and add some sprinkles in the middle.
I used these round sprinkles so that they would stand out, but you could also use sanding sugar or even edible glitter.
Again, press the top firmly down on to the lower layer so that there aren’t any gaps. Fill any gaps with additional icing.


After the icing between the layers has had a few minutes to set, you can decorate the top.
I decorated the top by outlining the entire snow globe and the “window” with red icing then filling it with the same red flood consistency icing.

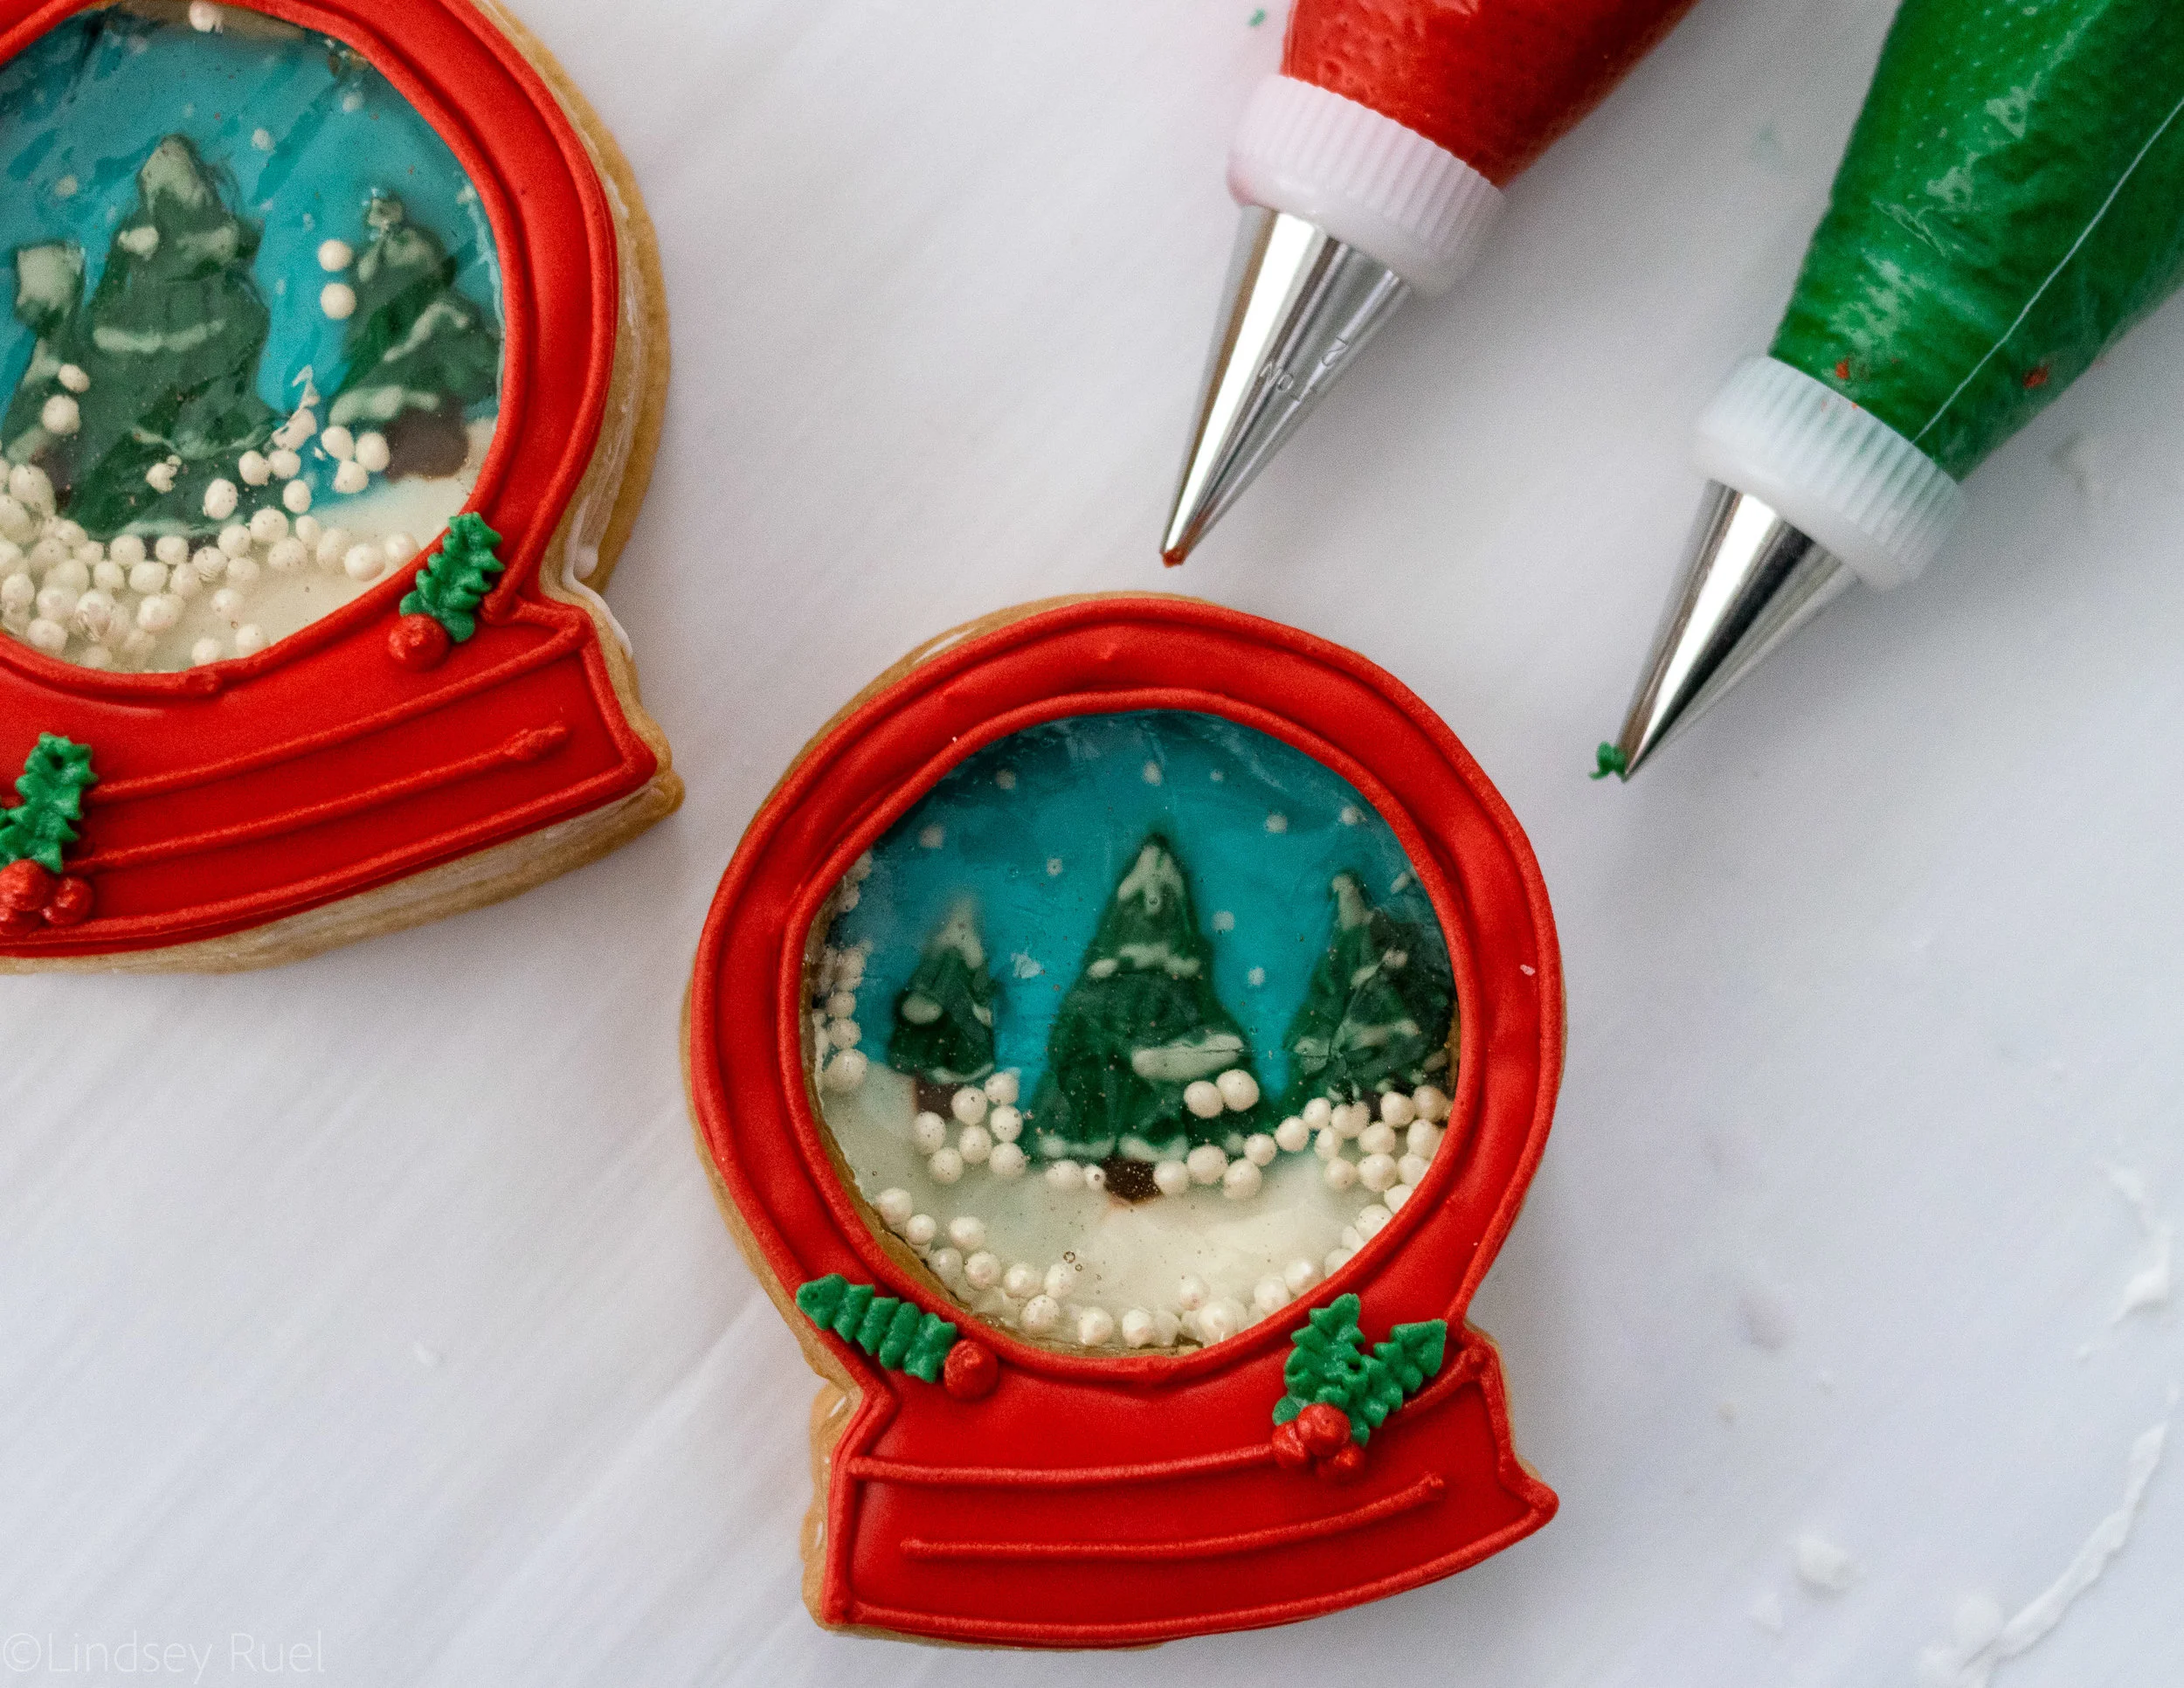
Once the first layer of icing has had a chance to set (about 10 minutes), pipe on details with piping or stiff consistency icing.
I used the red stiff consistency icing around the entire cookie and the “window”, then added a couple lines on the base.
I also used some red and green stiff consistency icing to pipe on a few holly leaves.

Then you are finally done!
I know it’s a lot of work (hence why I only made two), but they are just so darn cute and fun! You could just make a couple of them to be the centerpiece of your Christmas cookie display.
Or go all out and make more! It would be so fun to add names of your family members at the base of each one.

Recipes and Supplies

Prep Time: 30 minutes Bake Time: 15 minutes Total Time: 45 minutes
Makes 18-24 cookies
Ingredients
1 batch sugar cookie dough
1 batch royal icing
Sugar Glass:
1 cup granulated sugar
1/3 cup corn syrup
1/2 cup water
Instructions:
Preheat oven to 350 degrees.
Roll out cookie dough to about 1/4 inch thick. Cut into a snow globe shape. Transfer cut cookie dough to a baking sheet. For 2/3rds of the snow globes, cut a circle out of the center.
Bake for 15-17 minutes, or until barely golden brown around the edges.
While the cookies cool, make the sugar glass. Combine sugar, corn syrup, and water into a small sauce pan. Place over medium high heat and bring to a boil. Do not stir sugar while boiling. Continue to boil until mixture reaches about 290-300 degrees.
Place half of the snow globe cookies with the circle cut out face down on a piece of foil. Spoon the candy into the center of the cookie making sure the entire void is filled with sugar.
Let set for about 10 minutes, or until candy is completely hardened.
Meanwhile, use the royal icing to decorate the bottom layer (the full snow globe cookie) of the slow globe. Pipe royal icing around the edges of the cookie then press on the middle layer, ensuring that there are no openings. Let the icing dry completely, about 4 hours.
When the icing is dry, spoon on some sprinkles or edible glitter into the snow globe. Then, pipe royal icing around the edge of the center layer and place the top layer with the sugar glass “window” on top. Let dry, then decorated the front of the snow globe.